Gmail OAuth Service Accounts
Starting from version 2.10.0, EmailEngine can use Gmail service accounts. In this post, I'll show you how to set up such service accounts with EmailEngine.

NB! See updated OAuth2 configuration instructions for EmailEngine here
Starting from version 2.10.0, EmailEngine can use Gmail service accounts. What are service accounts anyway? In the context of email, it's a simple but powerful way for the domain admin to grant access to every email account on the domain without user consent. In this post, I'll show you how to set up such service accounts with EmailEngine.
Beware that as there are many steps involved, this will be a long post with tons of screenshots.
You need a Google Apps admin account to enable domain-wide delegation required for the service accounts to work.
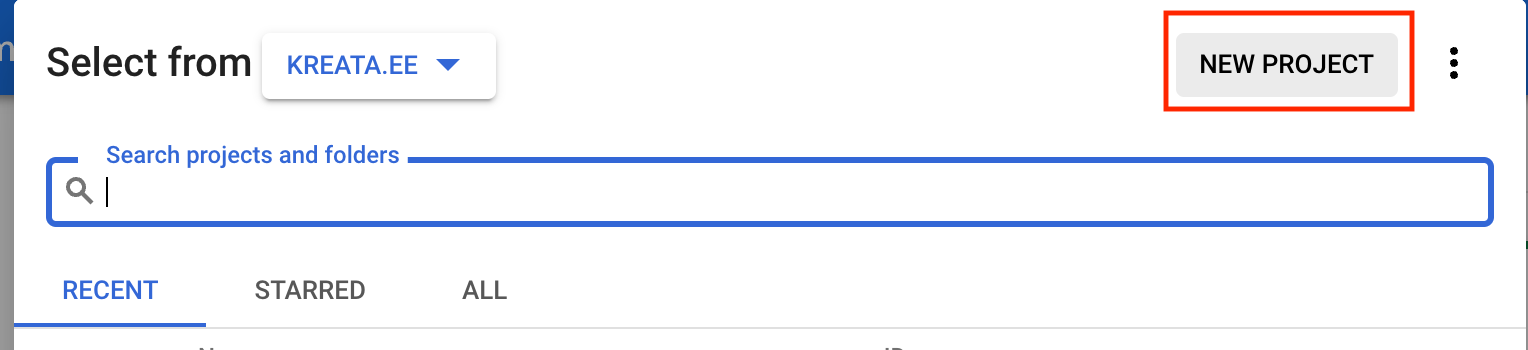
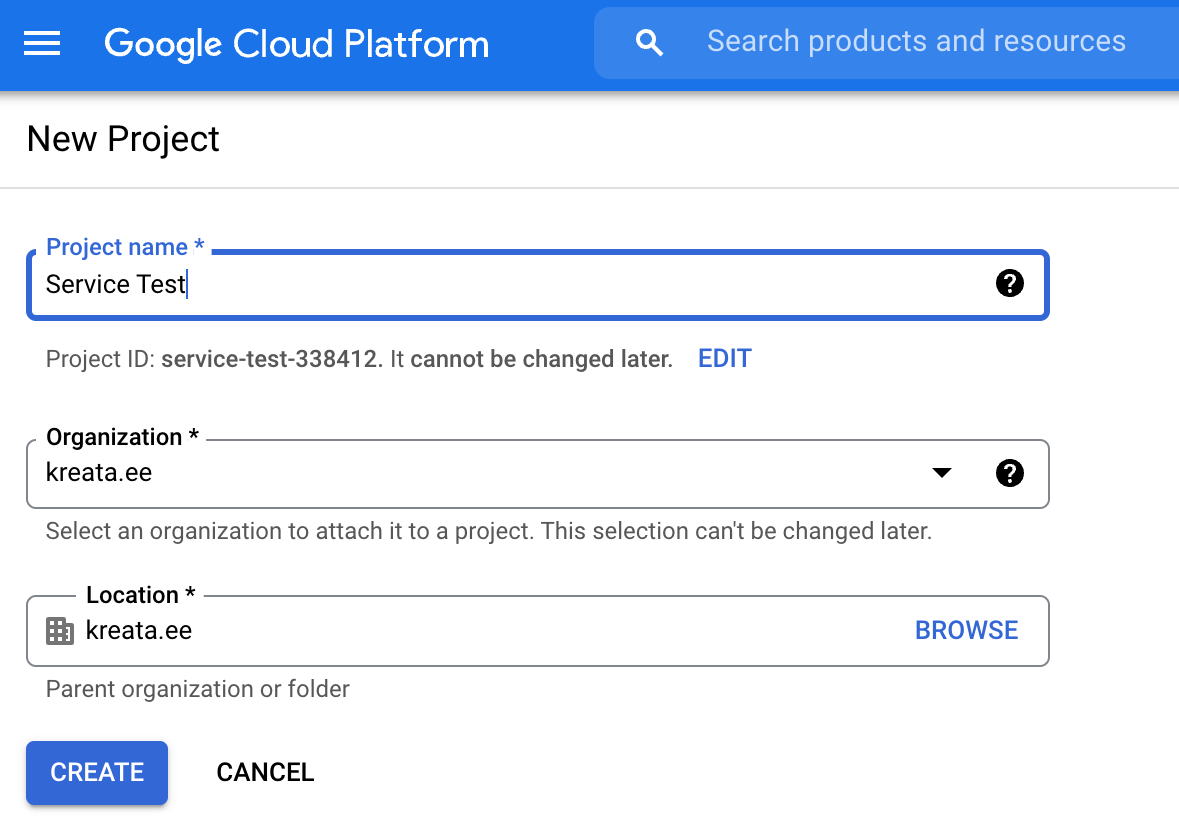
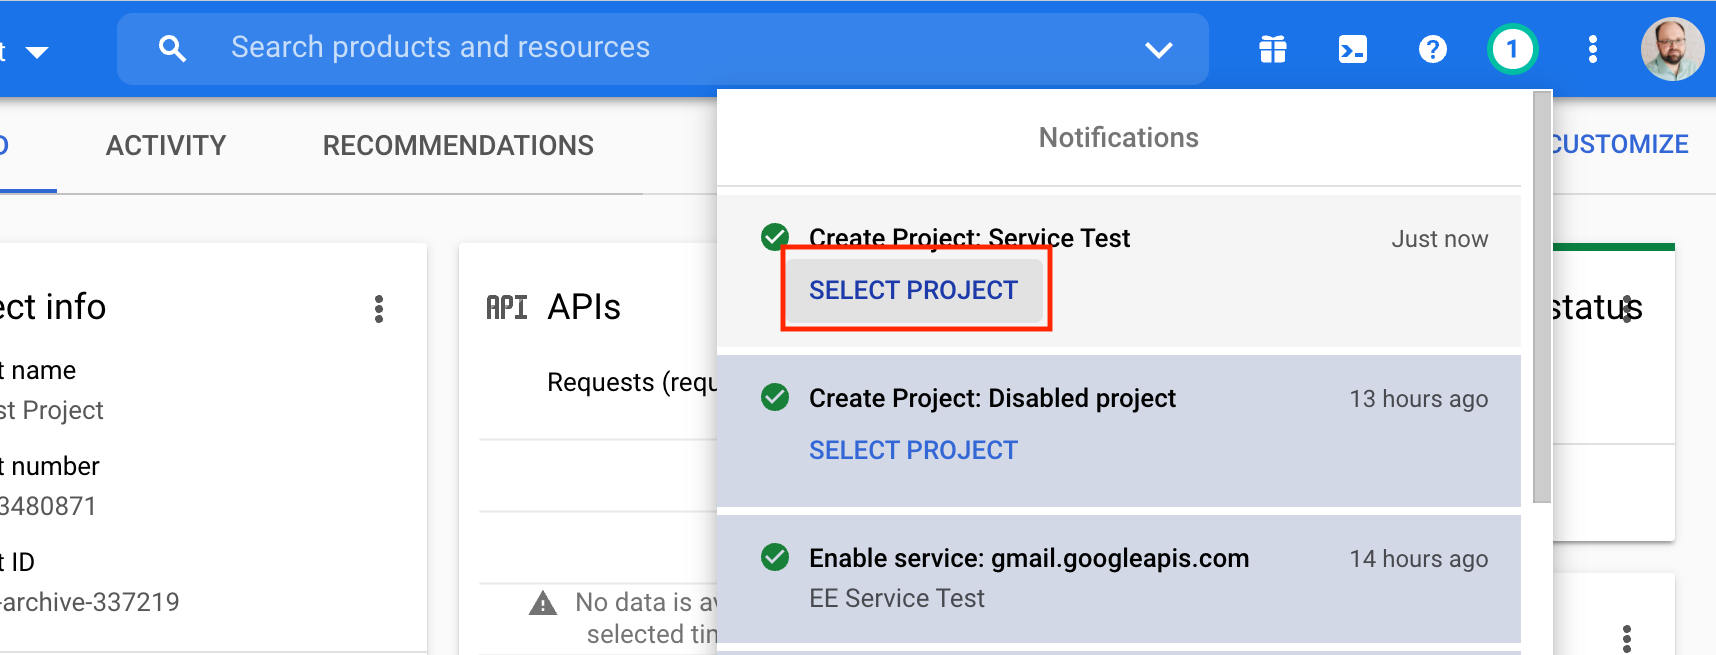
Step 1. Create a new project
First, open Google Cloud Console and create a new project.

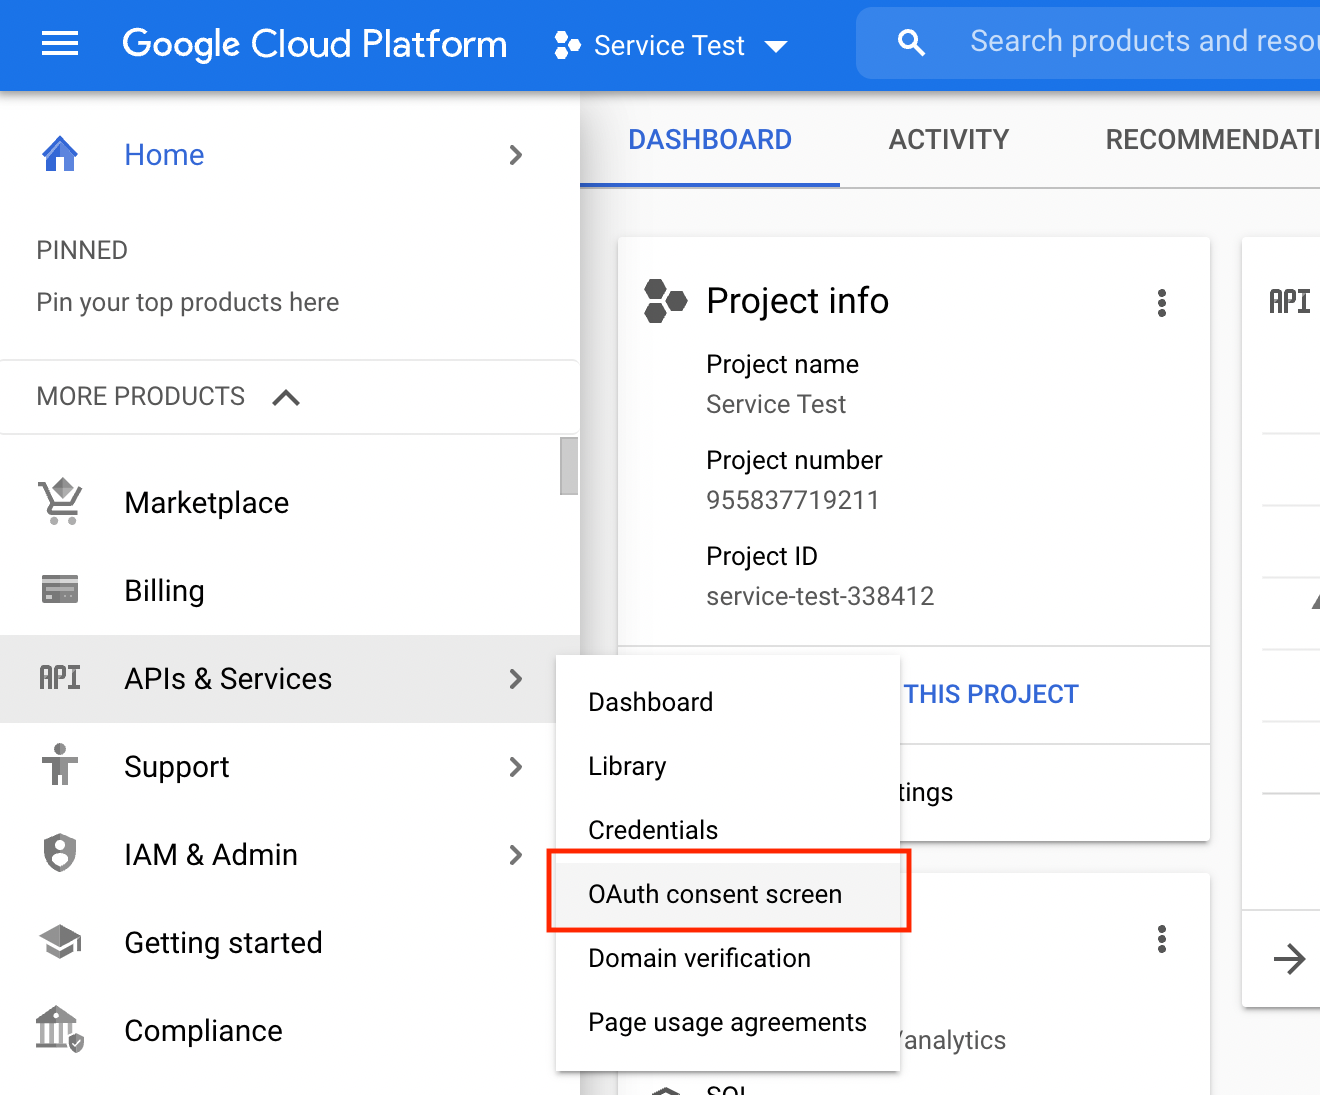
Step 2. OAuth consent screen
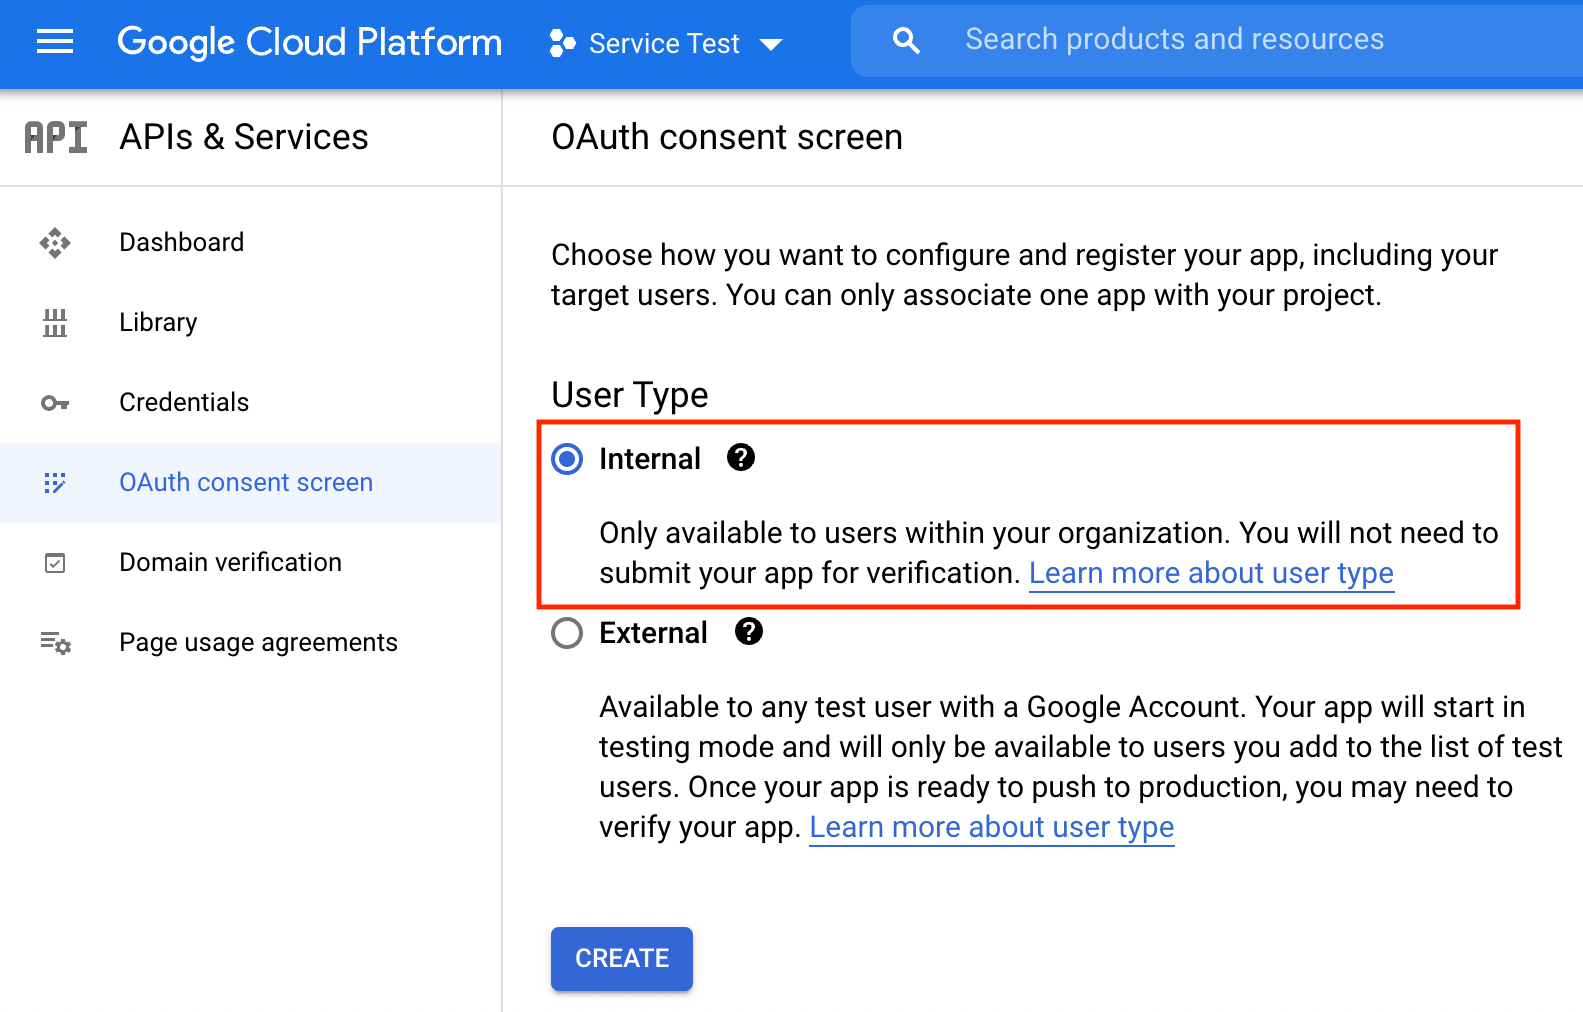
Now that we have our project created, we can set it up. We start by configuring the consent screen. Usually, this would be the screen shown to users to ask for their consent. We do not need user consent for service accounts, but the form allows us to configure some details about the project that needs to be set.
One of the critical parts of the consent screen setup is to select the correct User Type. For service account projects, this must be "Internal."
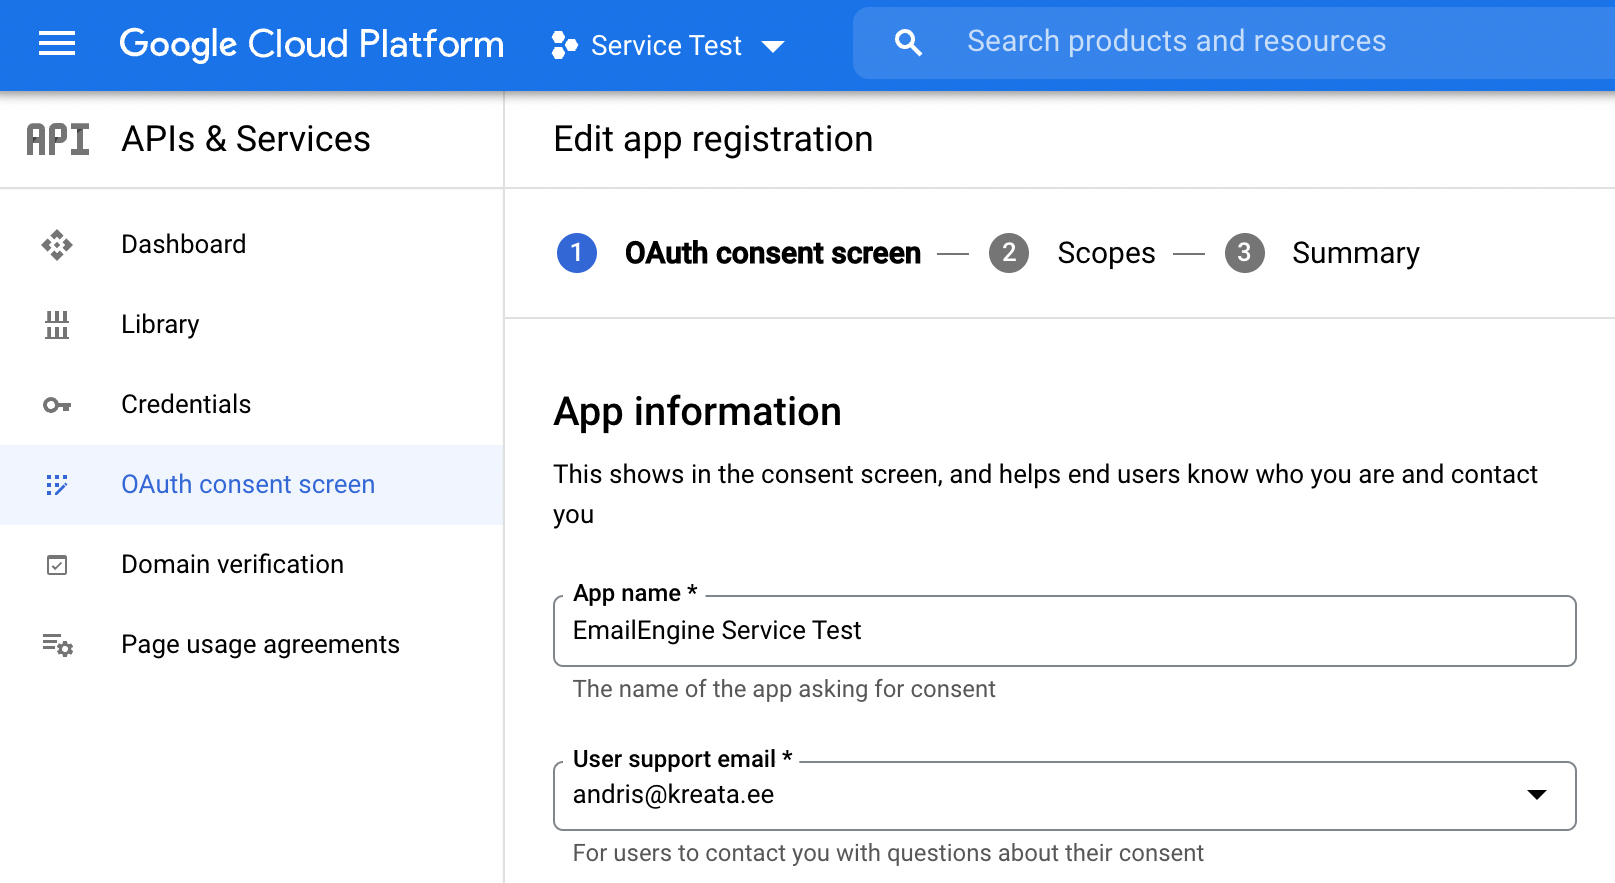
Next are standard fields that we must configure but do not matter much as the users never see these.
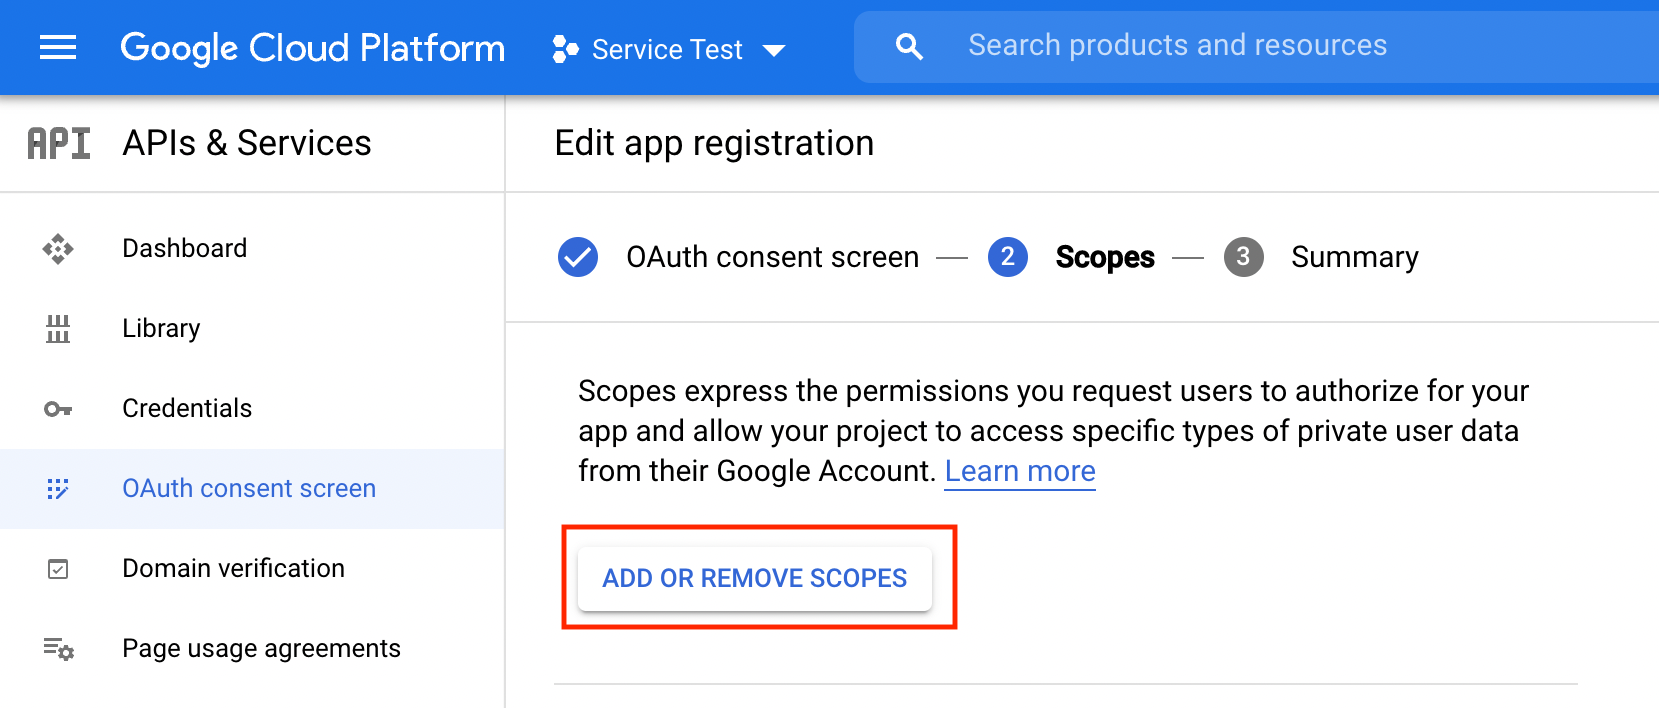
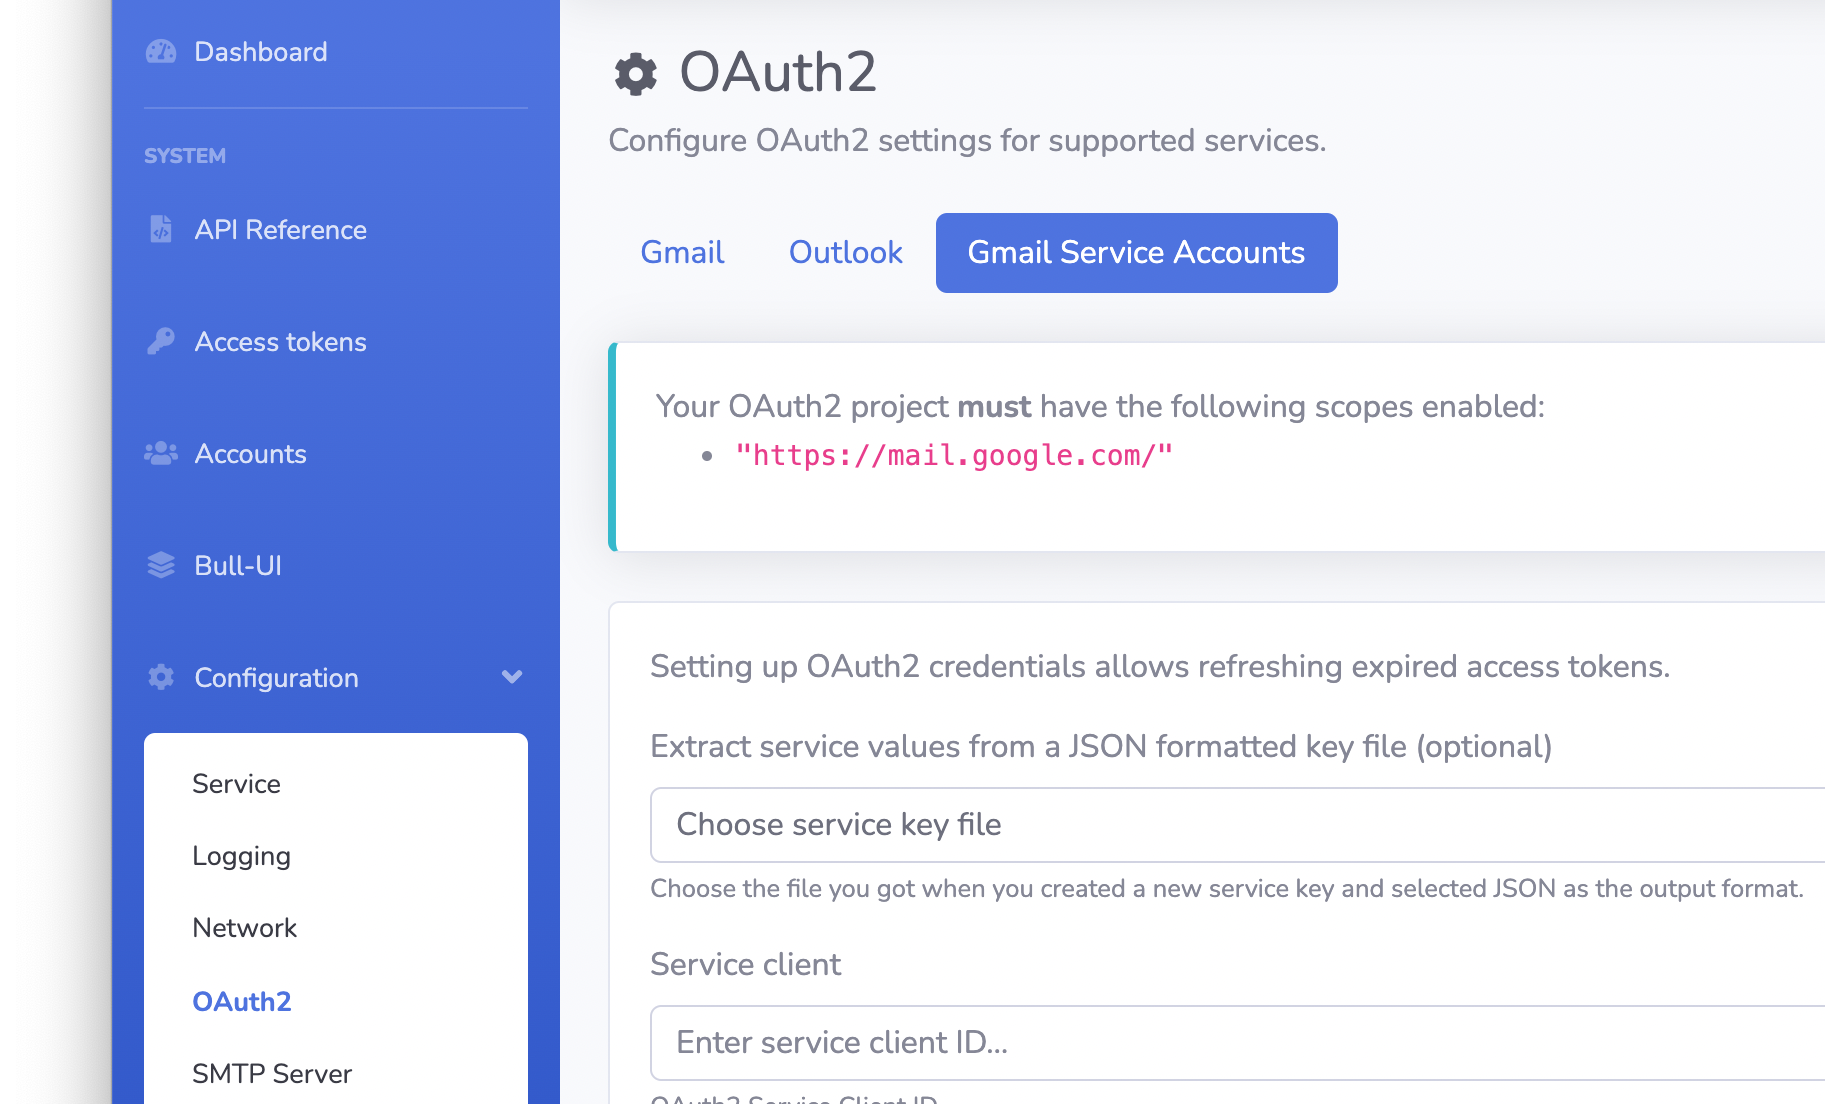
To allow EmailEngine to access IMAP and SMTP, we must set up the correct scope for the project.
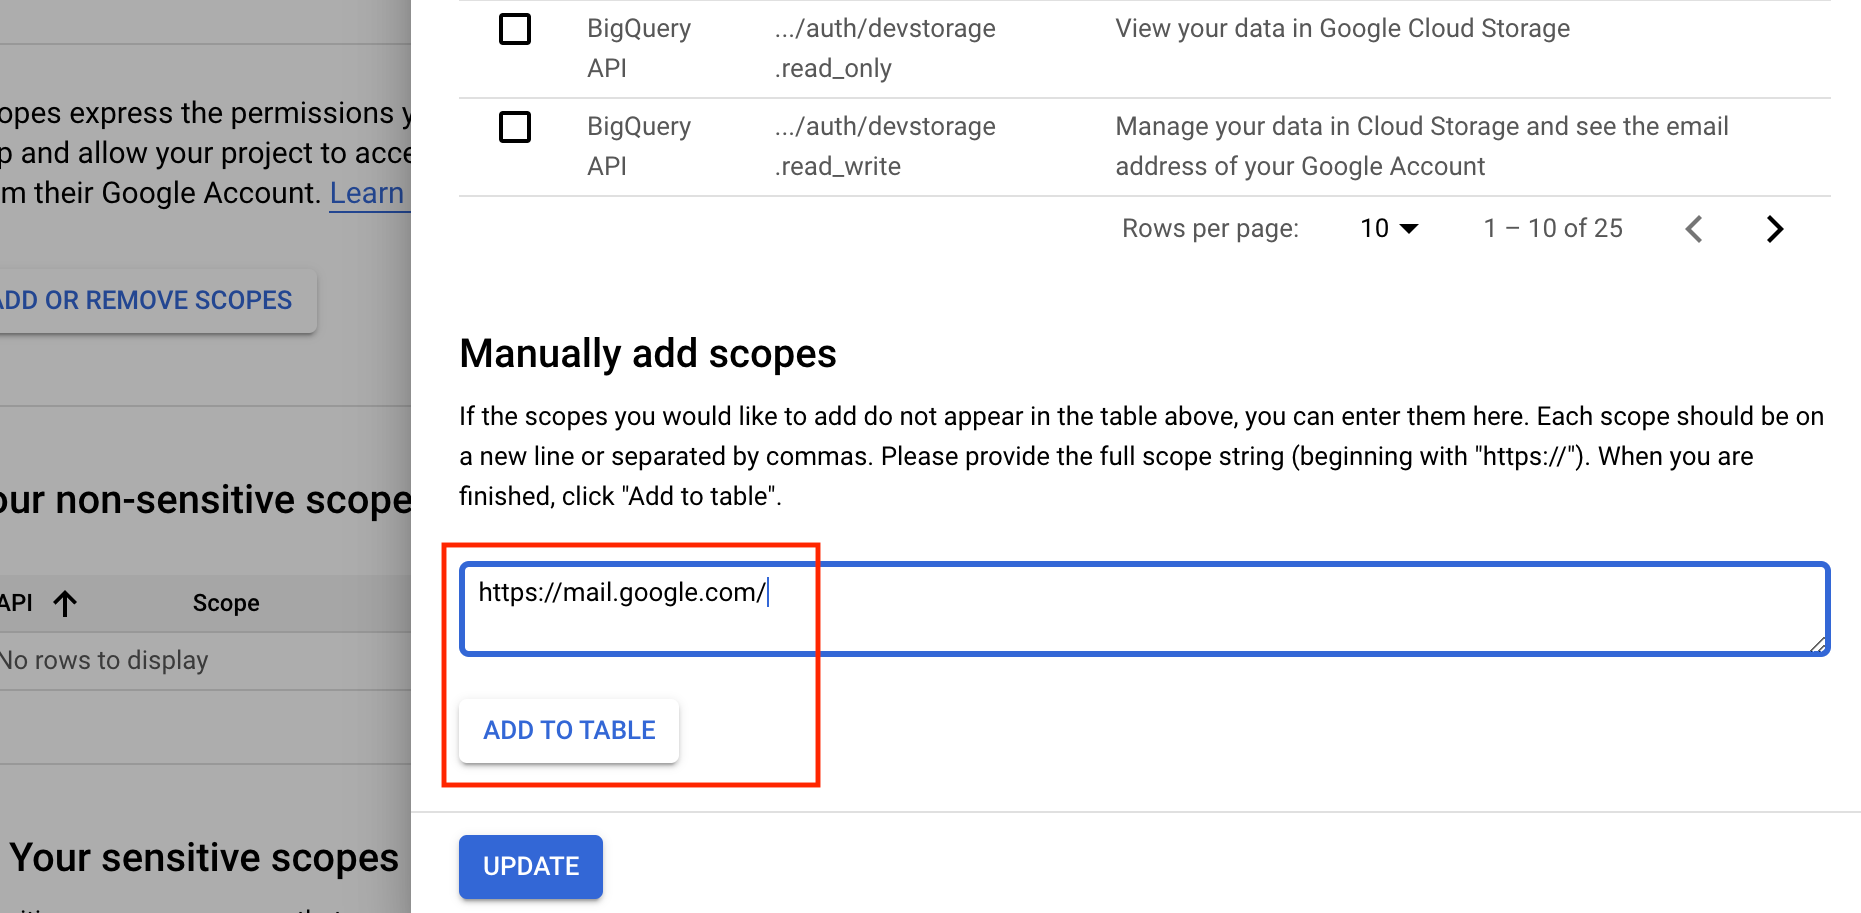
The scope required for IMAP and SMTP is not listed by default, so we need to add it manually. Scroll to the end of the list and insert "https://mail.google.com/" (without quotes) to the list.

To finish the consent screen setup hit that "Save and continue" button.
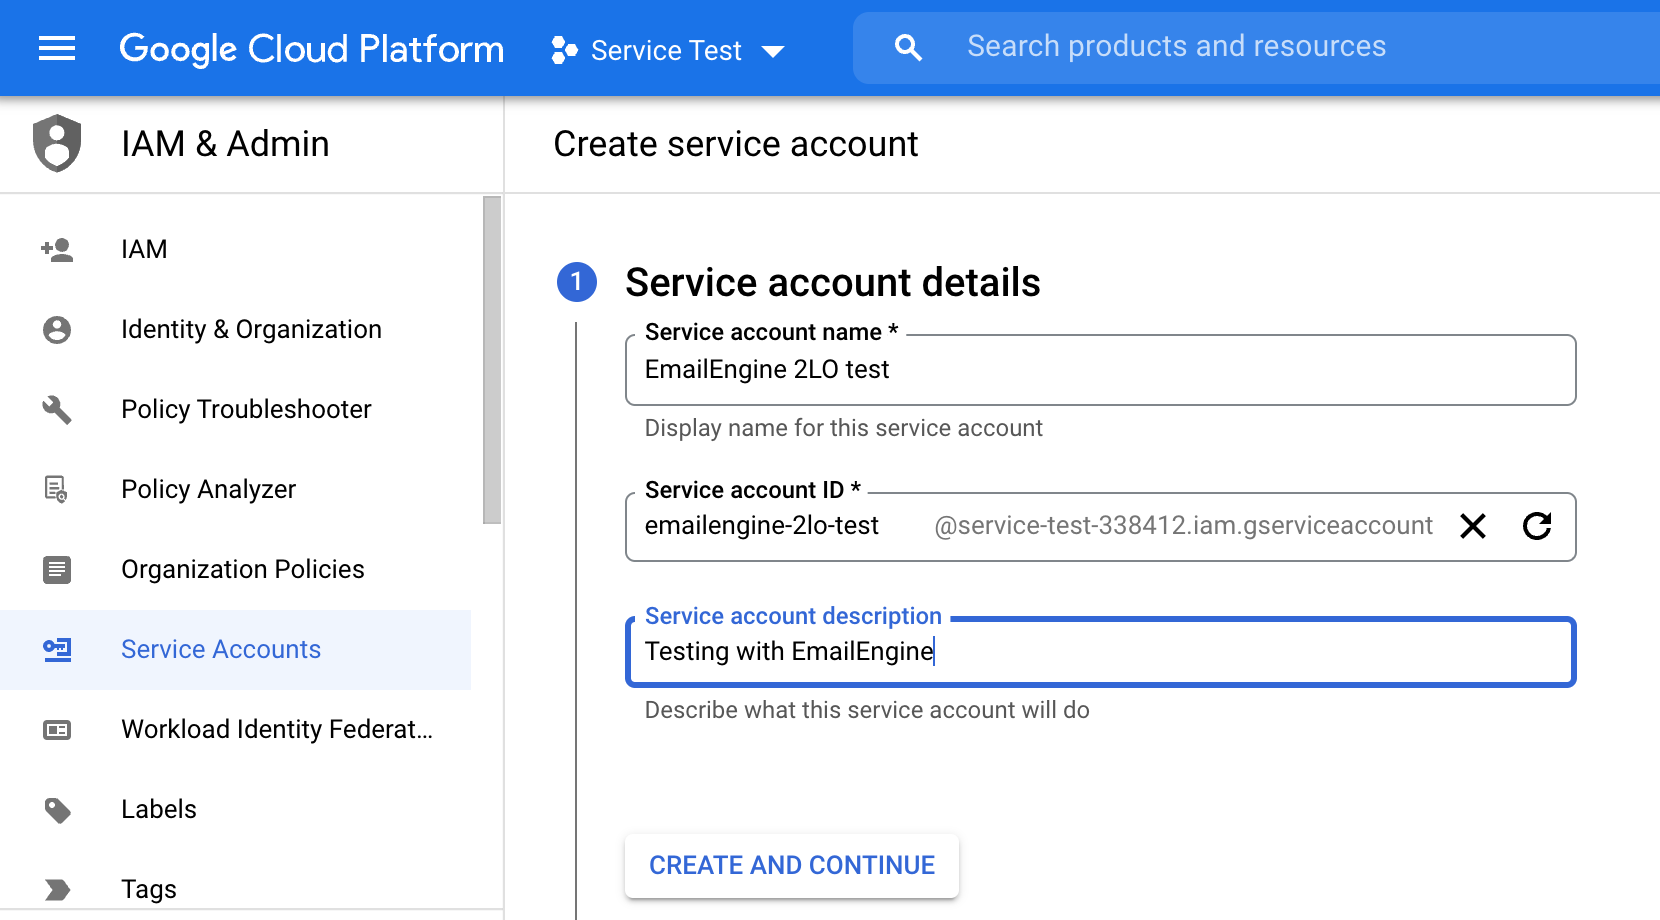
Step 3. Create a service account
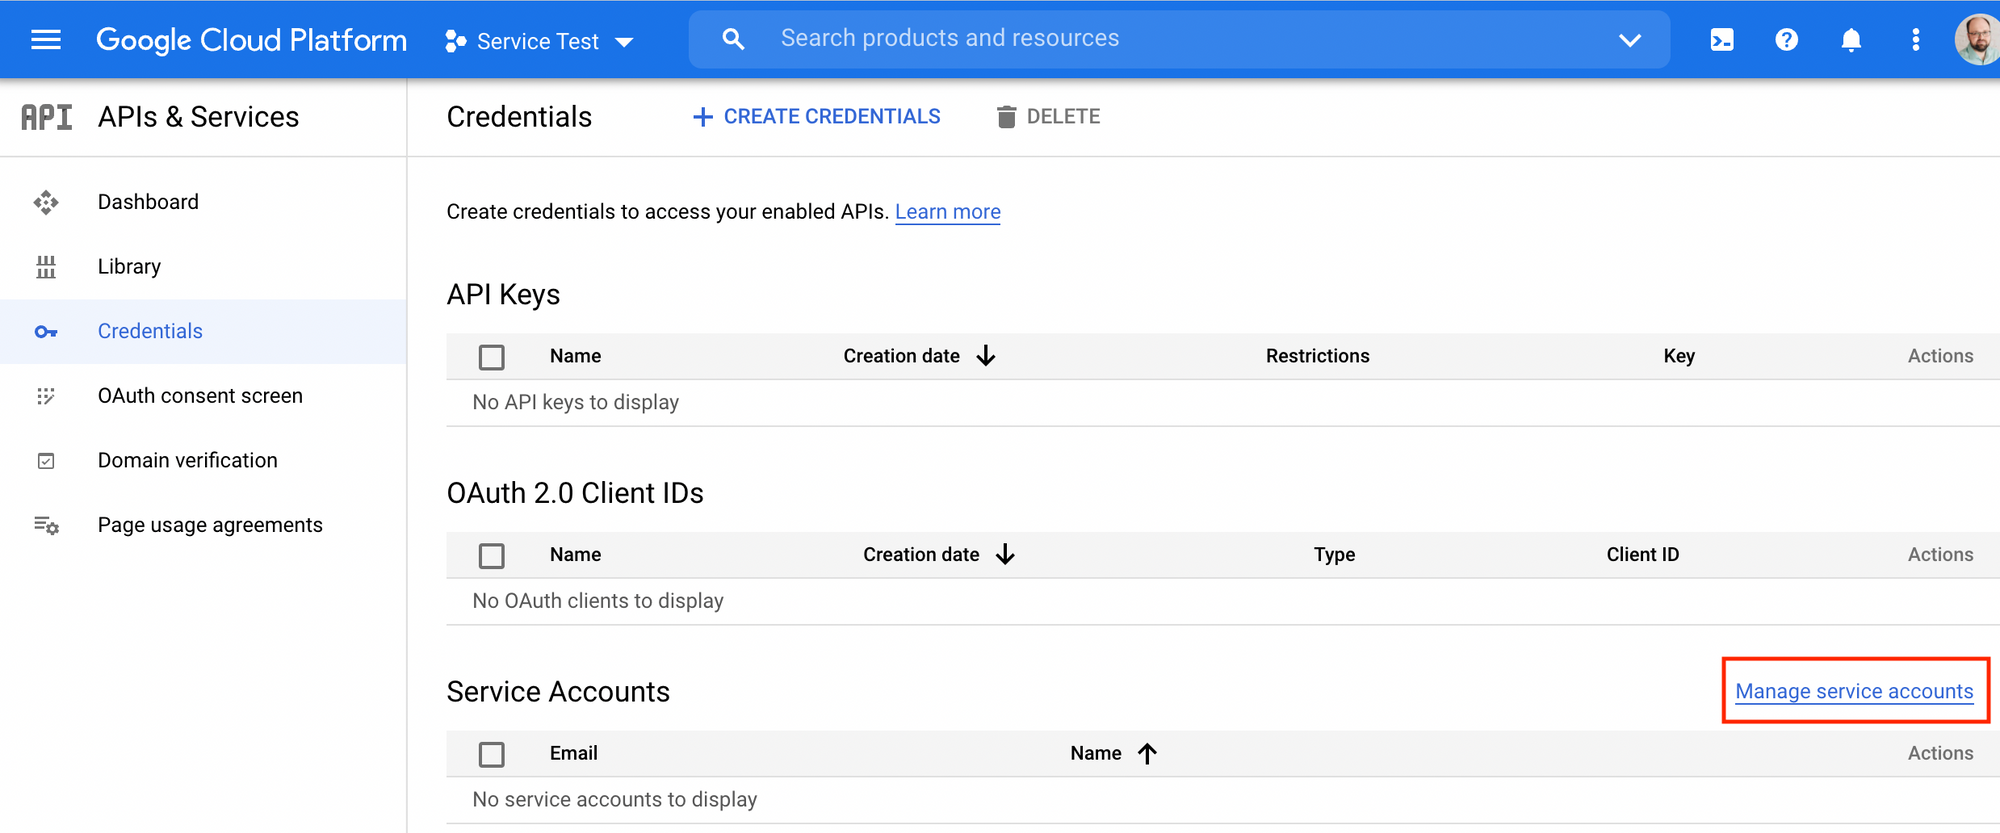
To start the setup for the service account, navigate to the Credentials page and click on the "Manage service accounts" link on the right bottom corner.
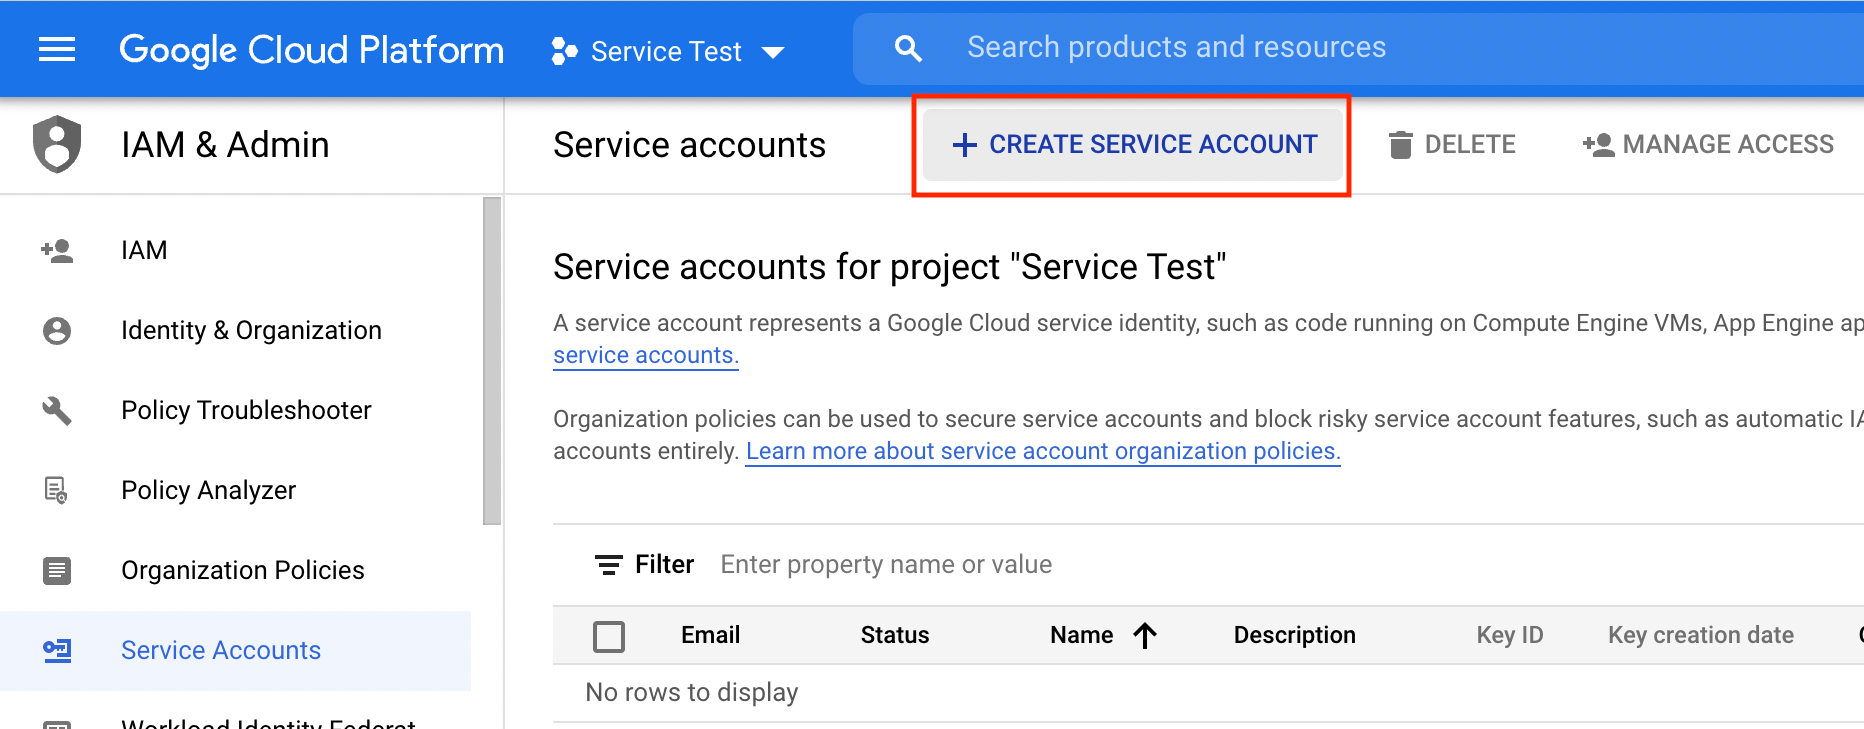
Next, find the "Create service account" button.
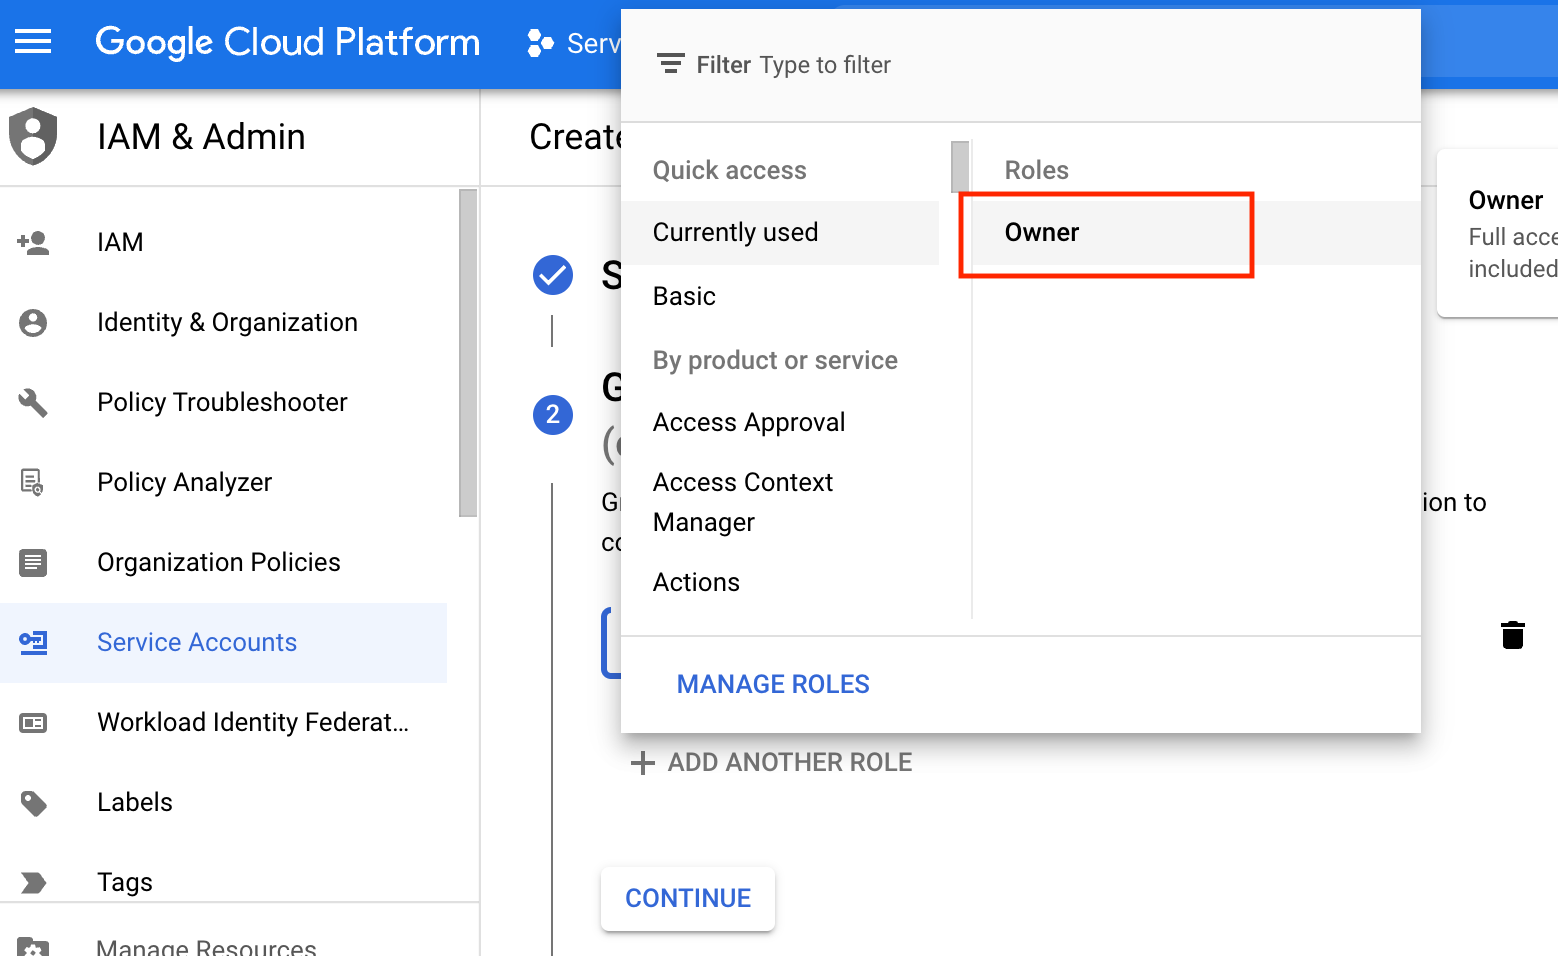
When you are asked to select a role, choose "Owner." I'm not 100% sure if it's required, but it worked for me.
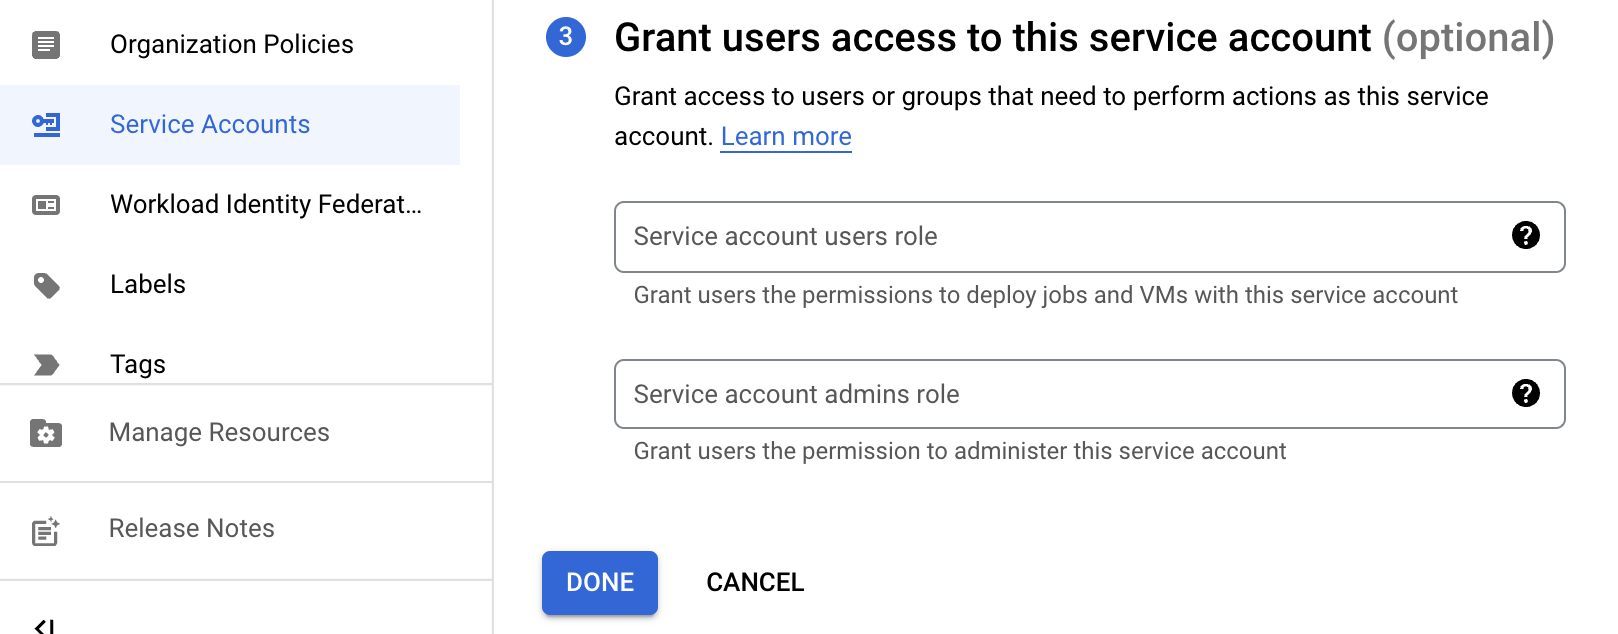
Leave the following fields empty and click on "Done" to finish the setup.
Step 4. Enable domain-wide delegation
If you think you can access any email account just like that, you don't. This is where the domain admin part comes into play.
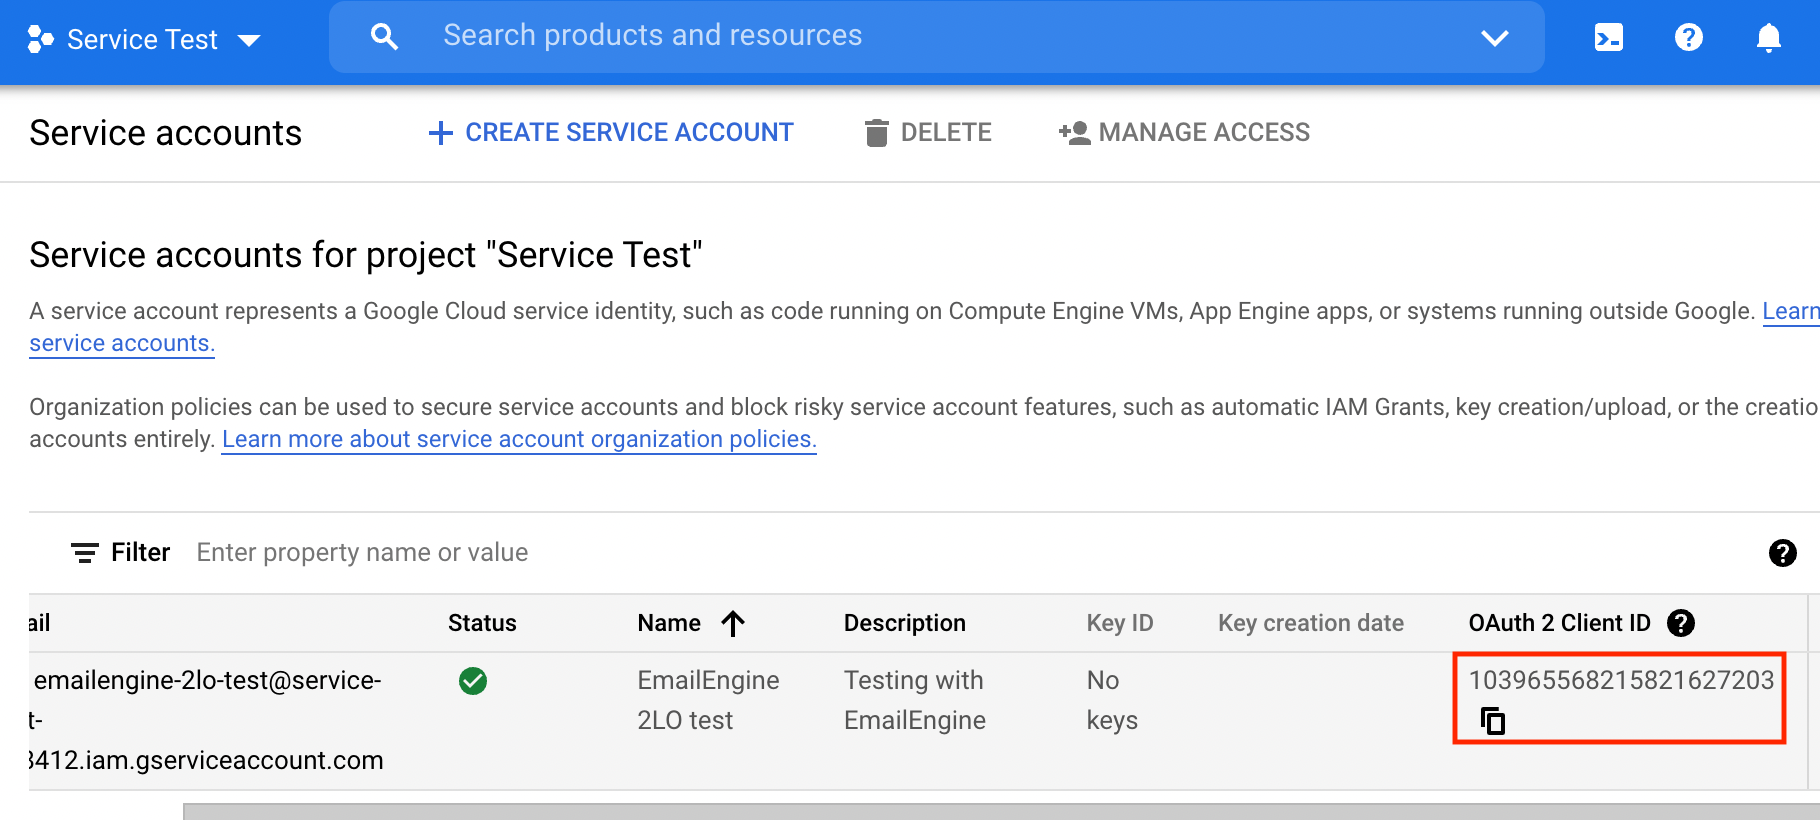
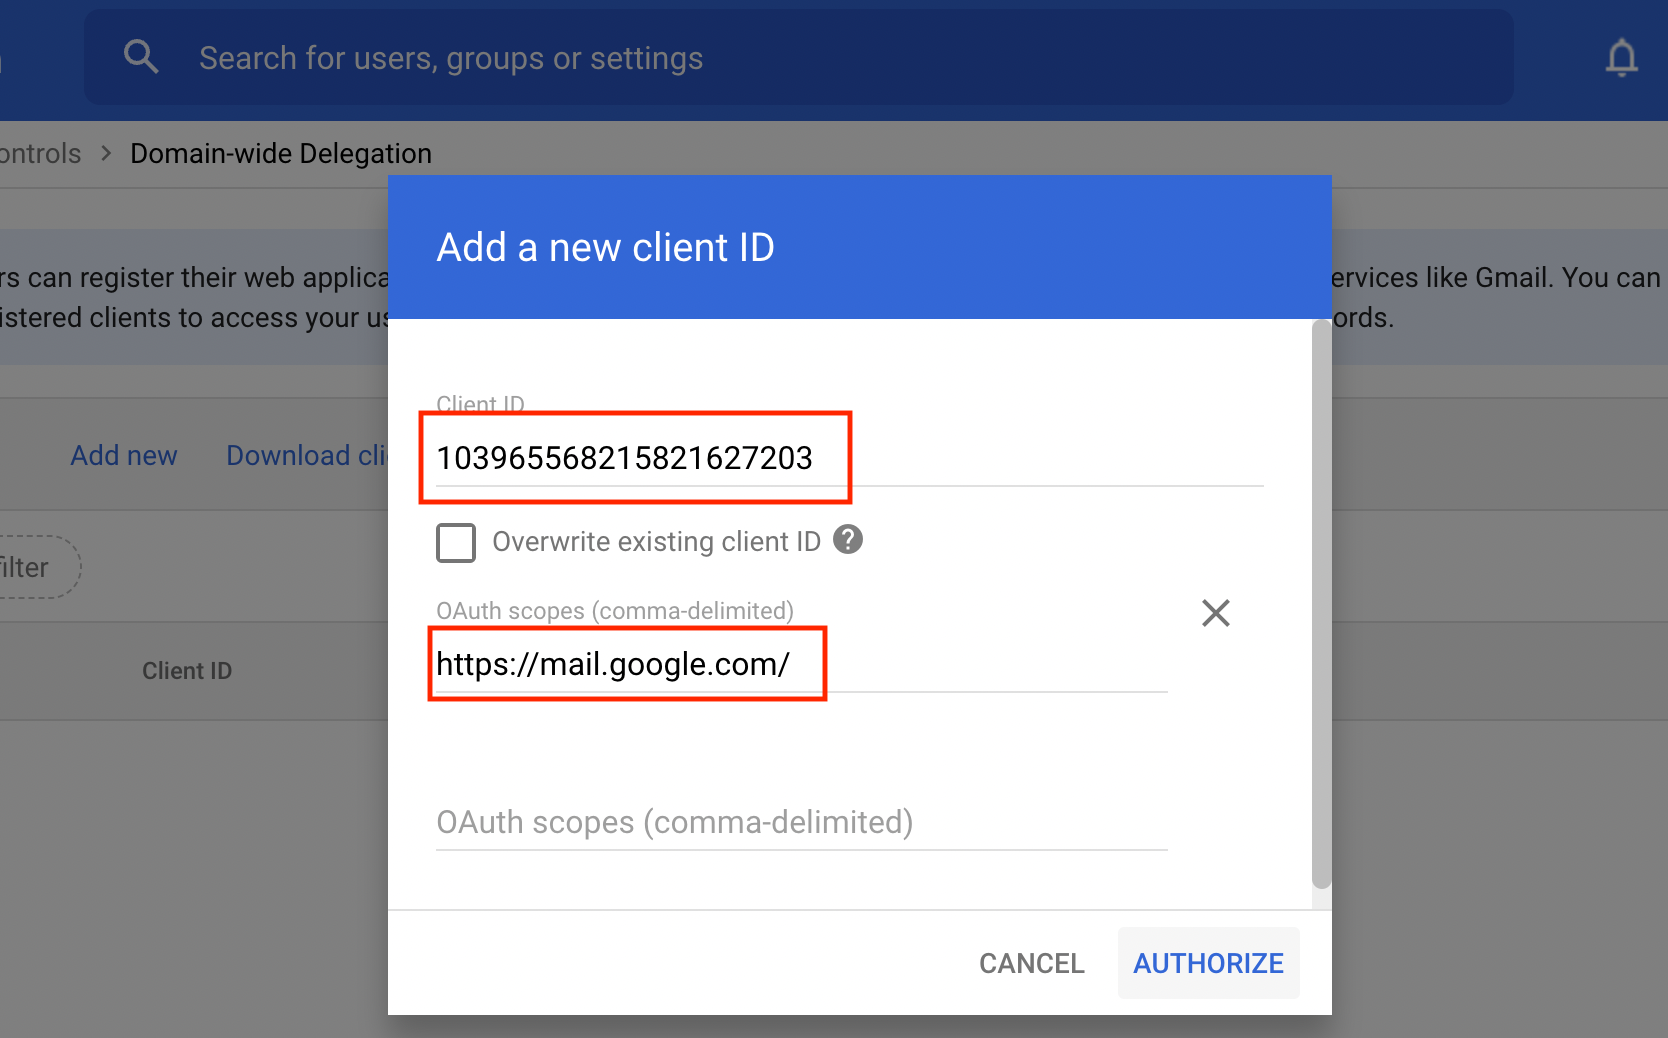
First, we need the OAuth2 Client ID value for our service account. You can find it from the listing. Copy it.
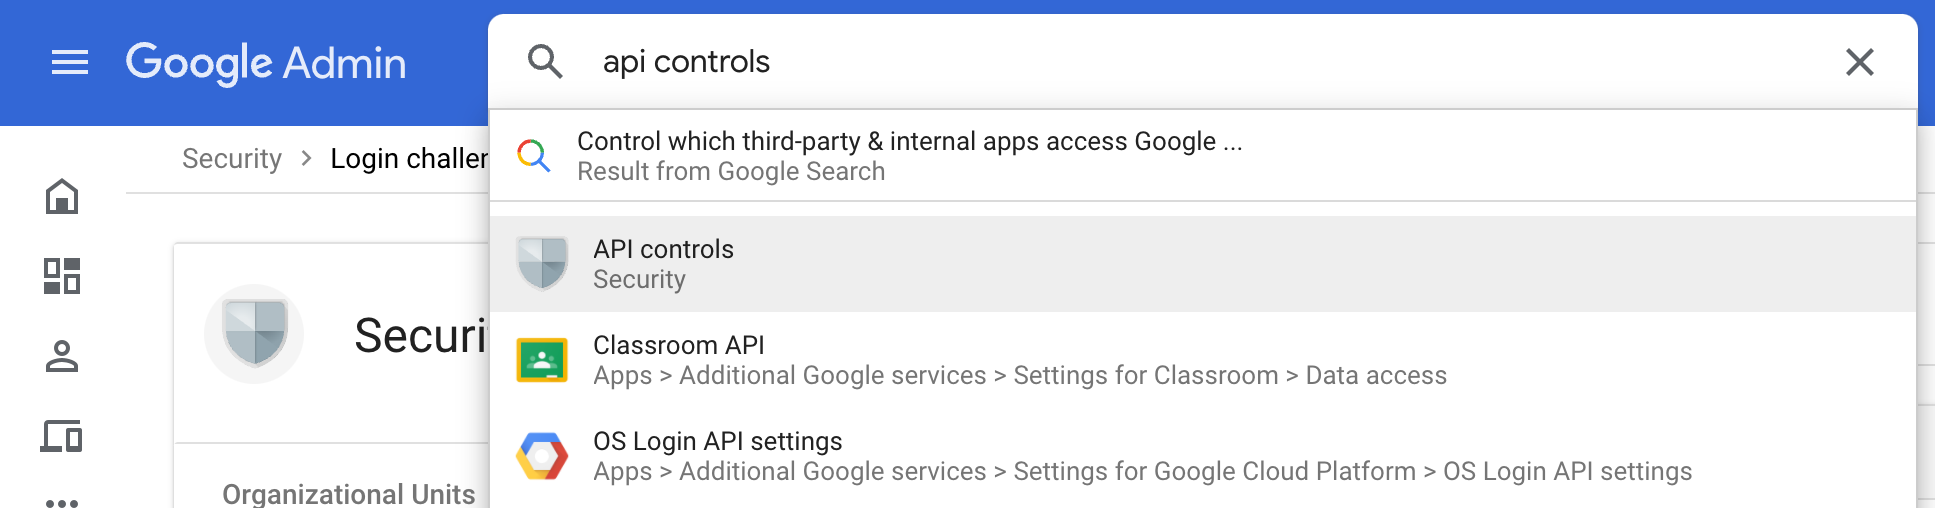
Open Google Admin for your domain and search for "API Controls."
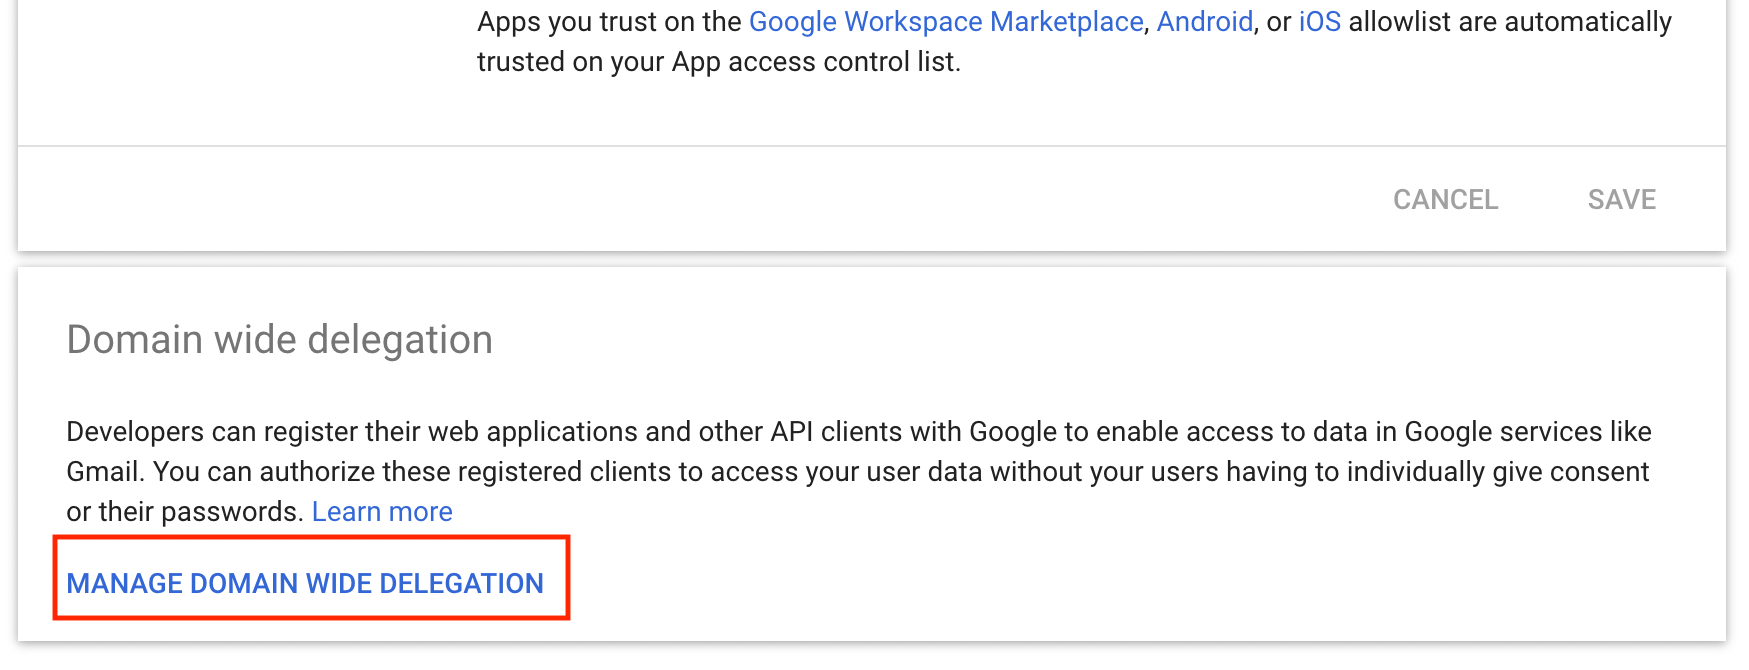
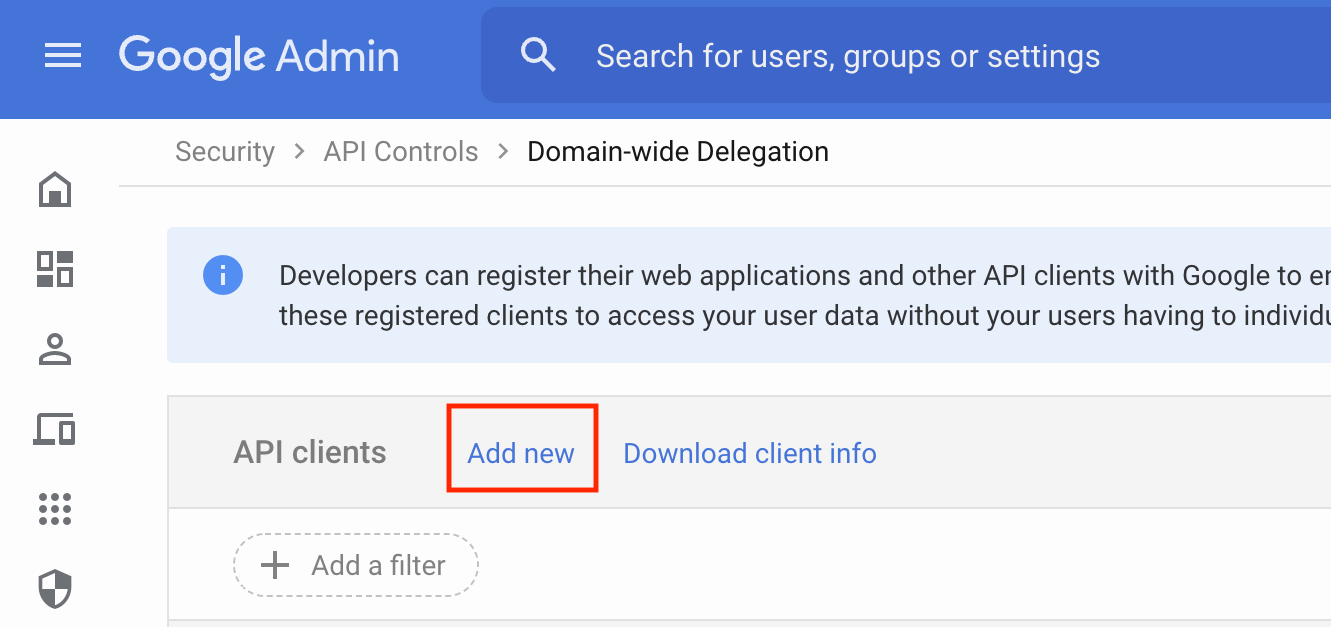
Scroll down on the opened page to find a Domain-wide delegation" section. Click on the button to manage it.
Add a new API client.
Now we can use that Client ID that we copied earlier. Also, set the same OAuth2 scope as in the consent screen setup ("https://mail.google.com/" without quotes). Click in "Authorize" to finish setting up the delegation.
Step 5. Acquiring the credentials file
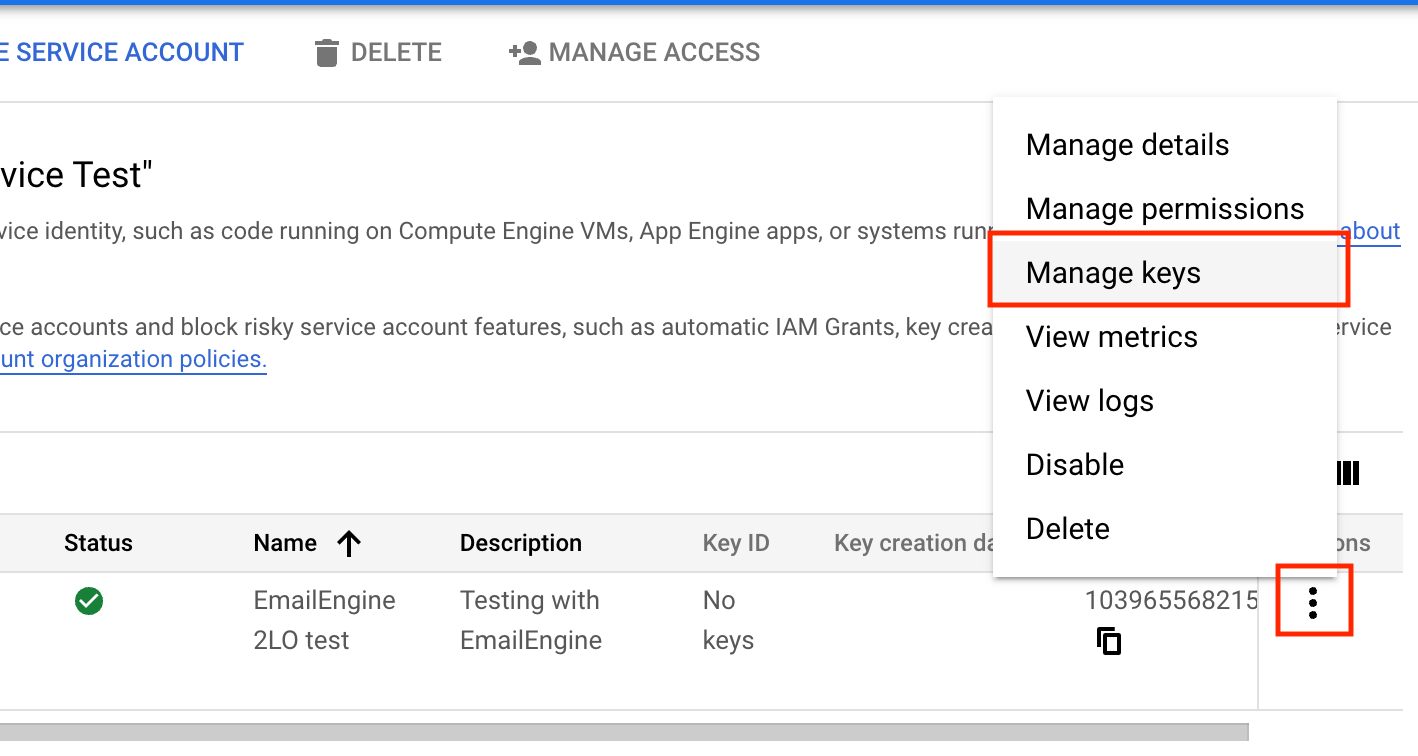
Open the context menu for our service account on the service accounts page and click on the "Manage keys" menu option.
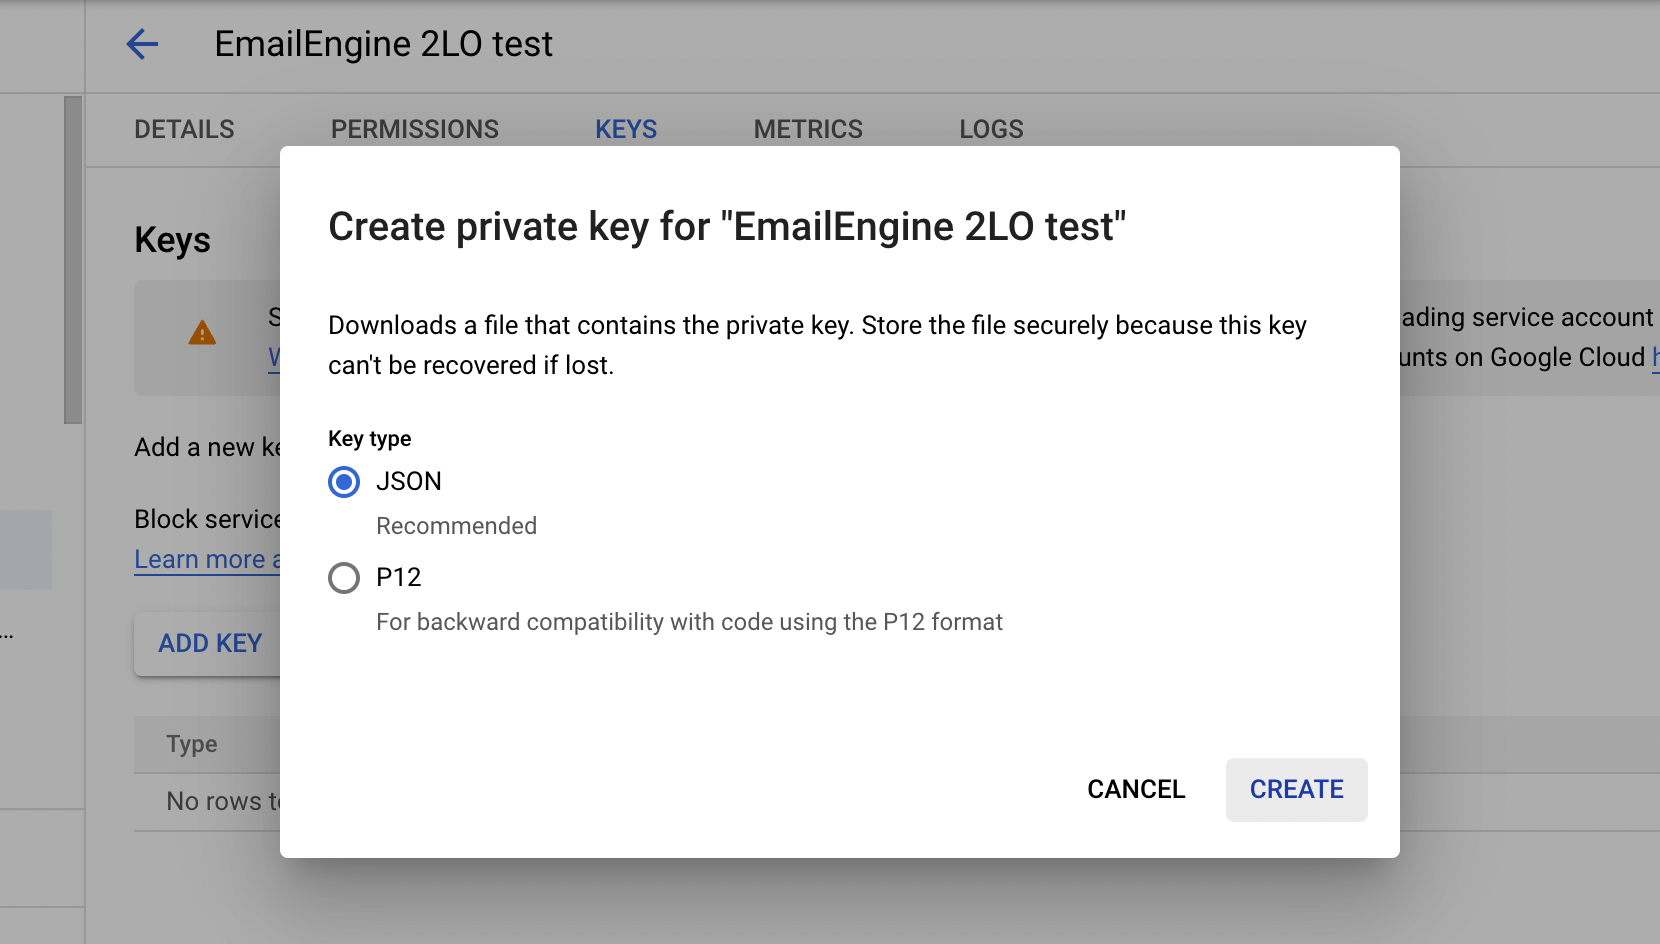
Create a new key from the Add Key menu.
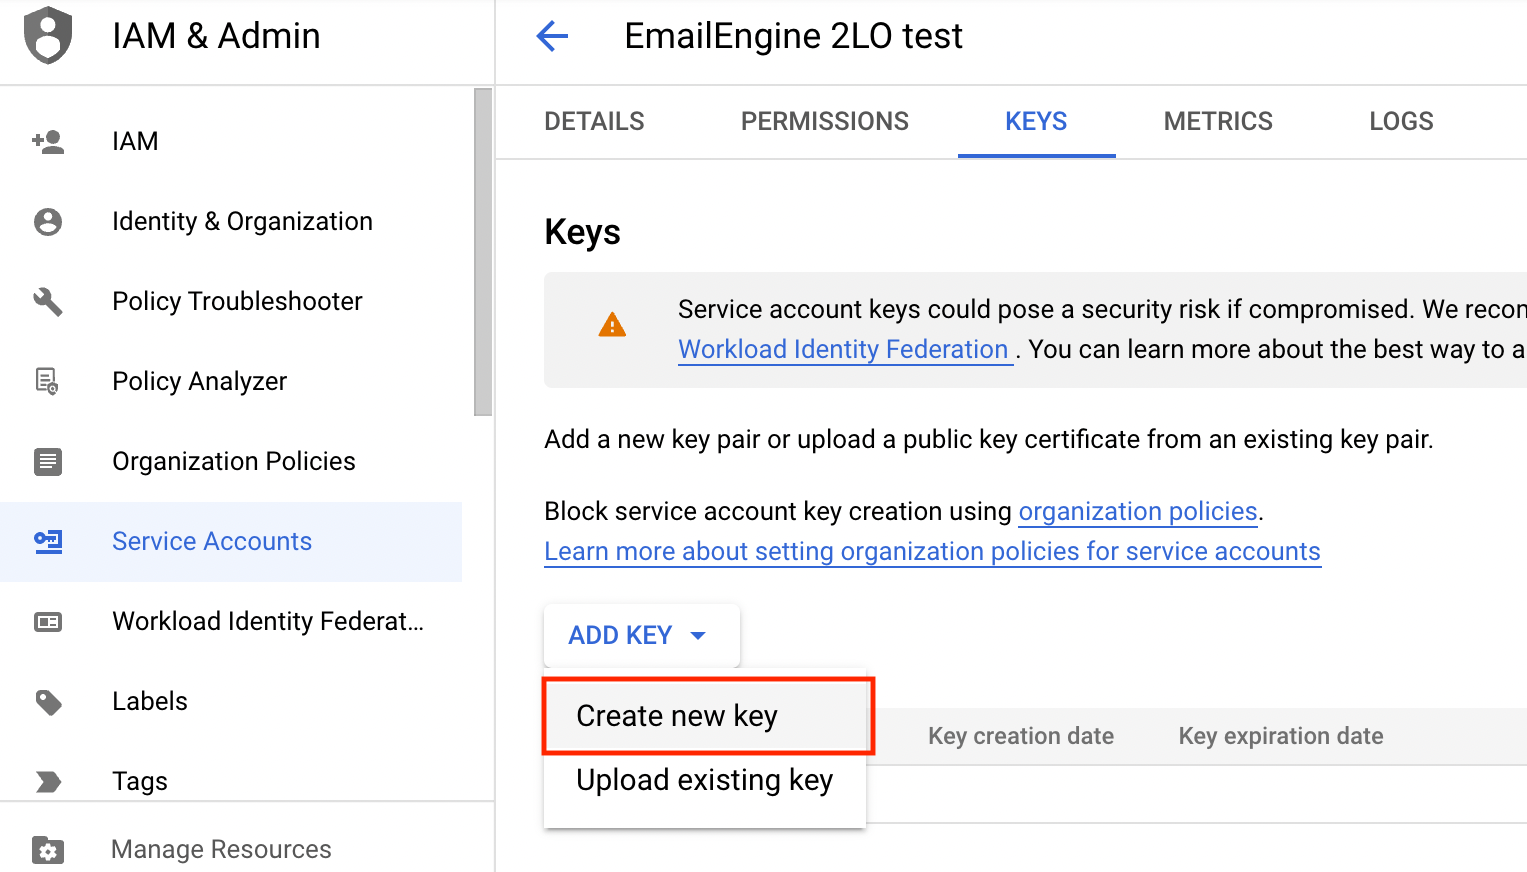
Select JSON as the format and click "Create" to create the key. The browser should automatically download the generated key file as a .json file.
Step 6. Enable Gmail API
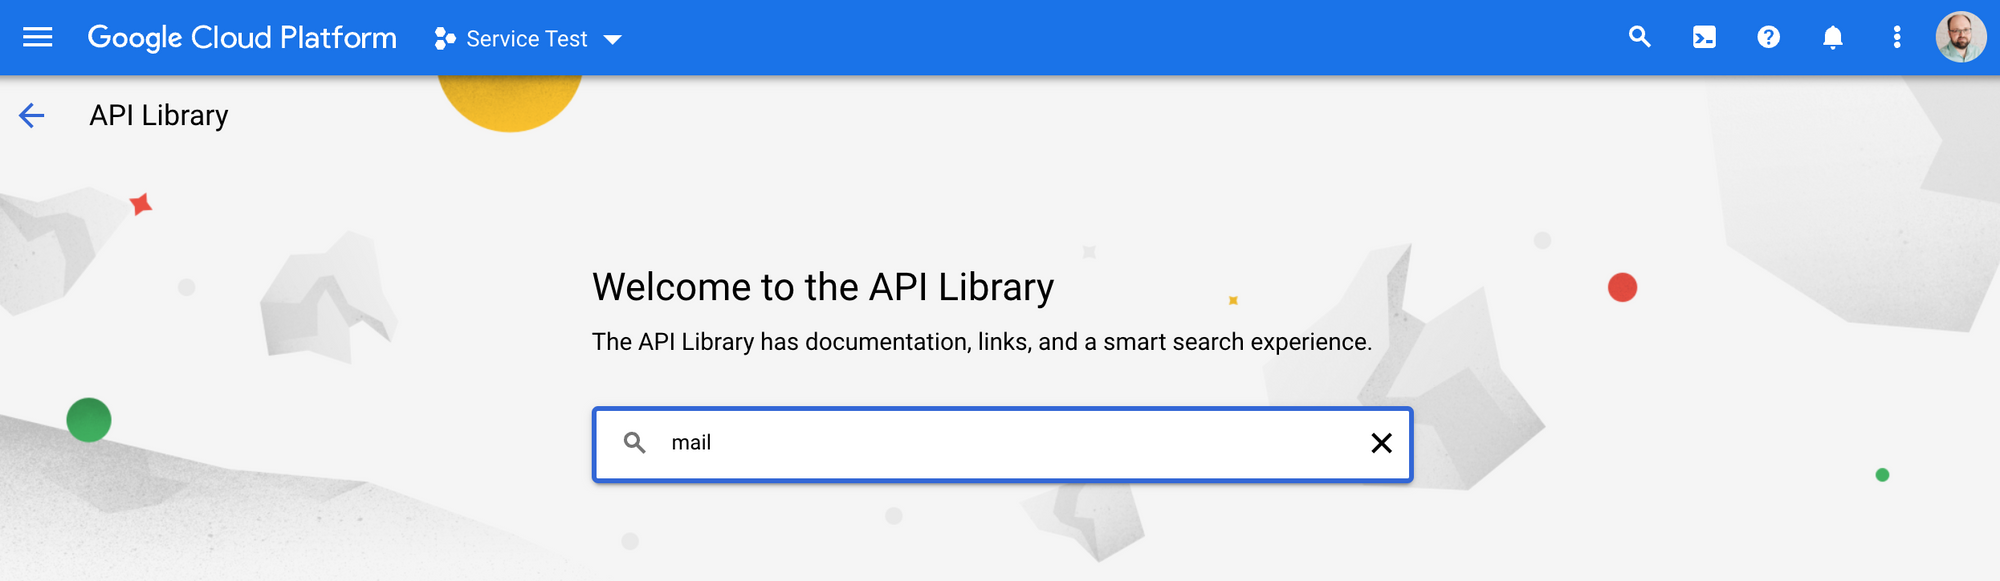
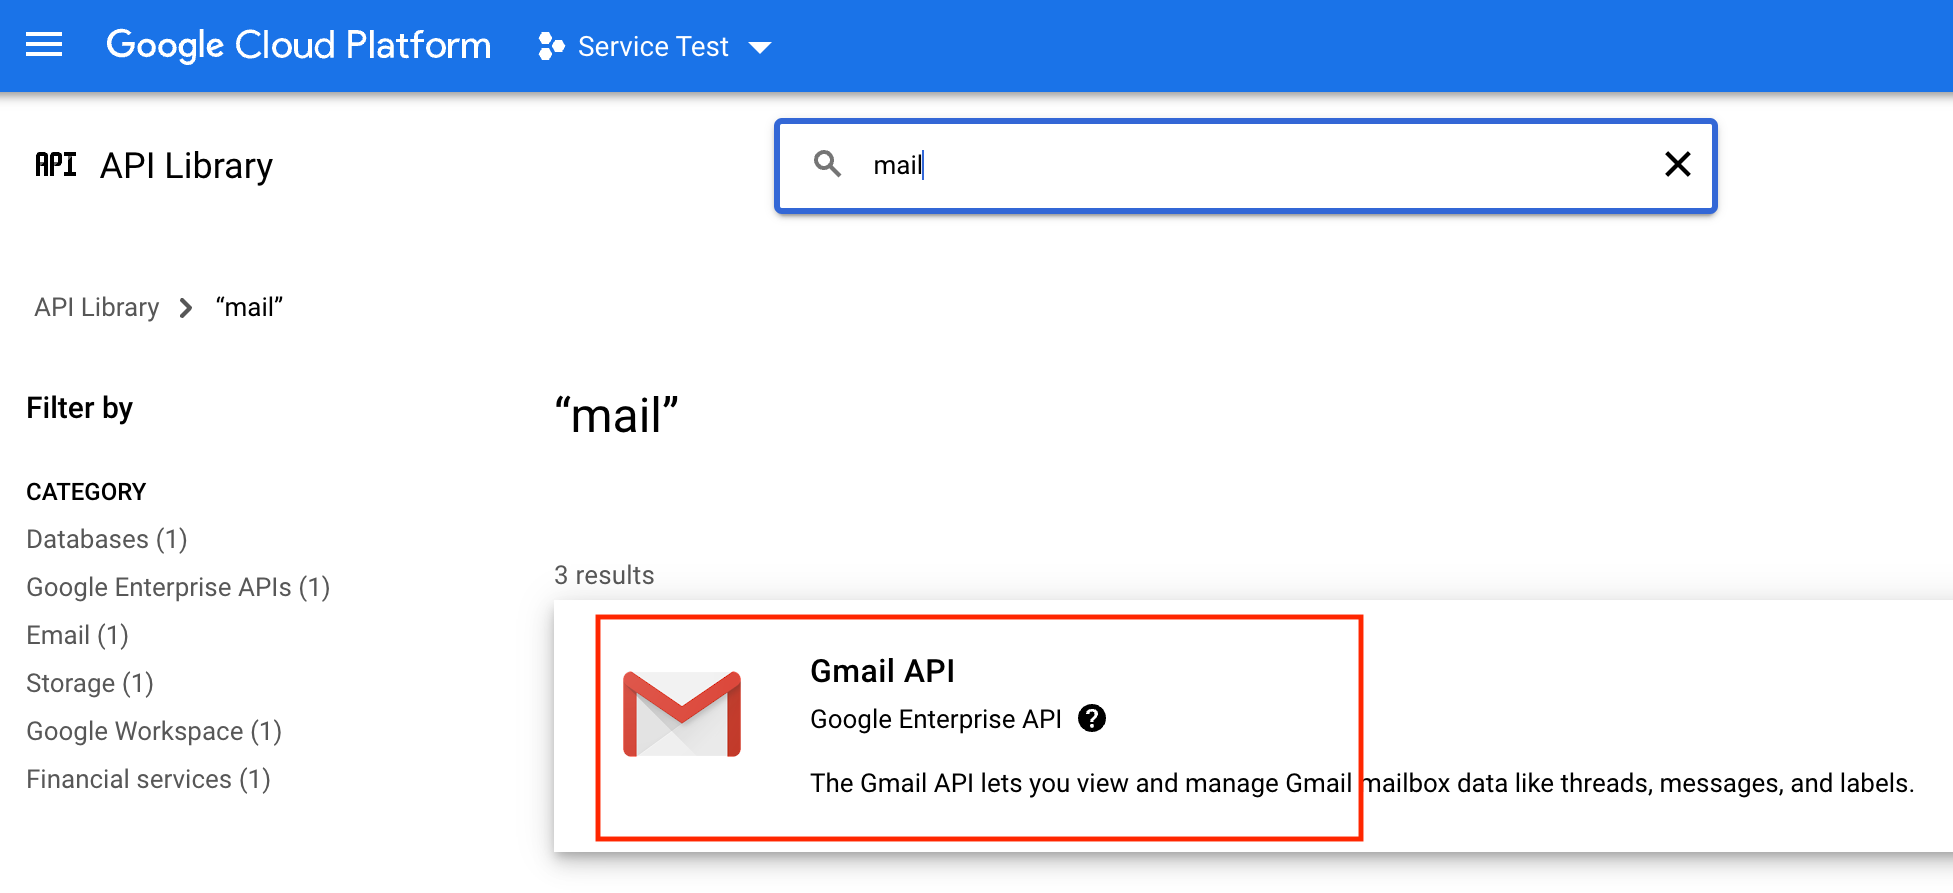
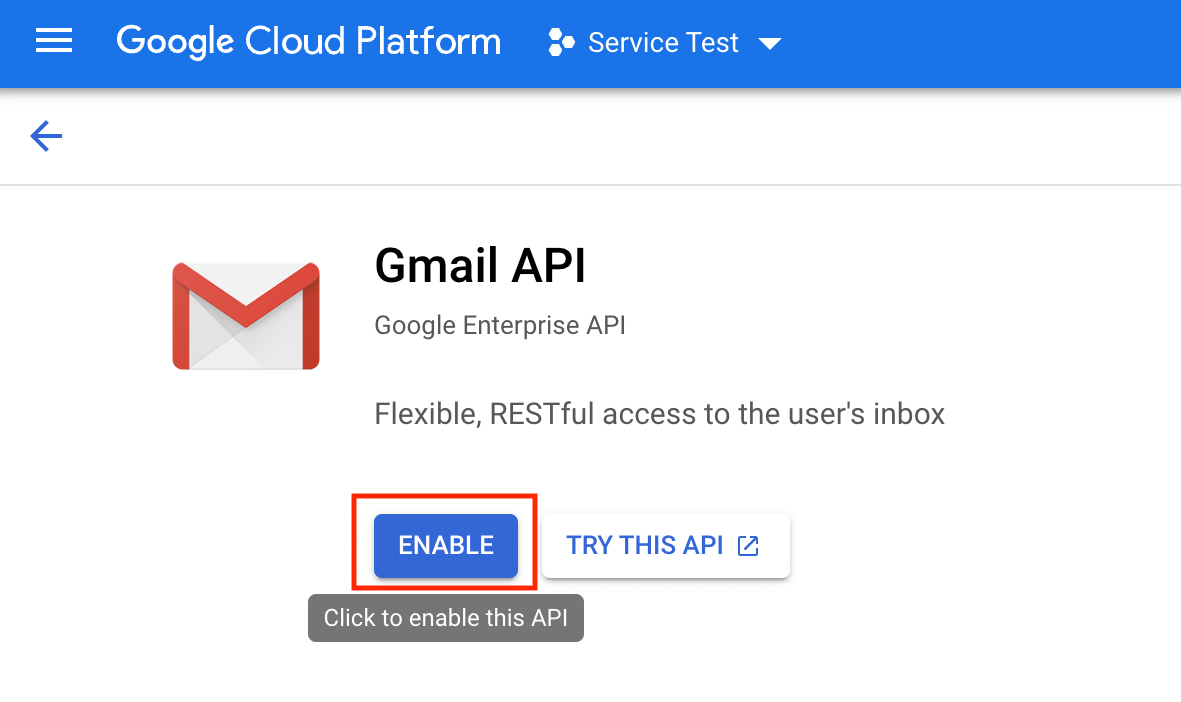
All API endpoints are disabled by default as this is a new project. EmailEngine needs to use Gmail API to resolve account email address during account setup, so we have to enable that API. You can find the "Enable APIs and Services button" from the APIs & Services dashboard.

Search for "mail" to get to the Gmail API.
Step 7. Configure EmailEngine
Now that We have completed our Service Account setup, we can configure EmailEngine to start using it.
Navigate to the OAuth configuration page and select Gmail Service Accounts.
Use the file input to load the service account key file. This would fill all the required fields based on the information stored on that file.
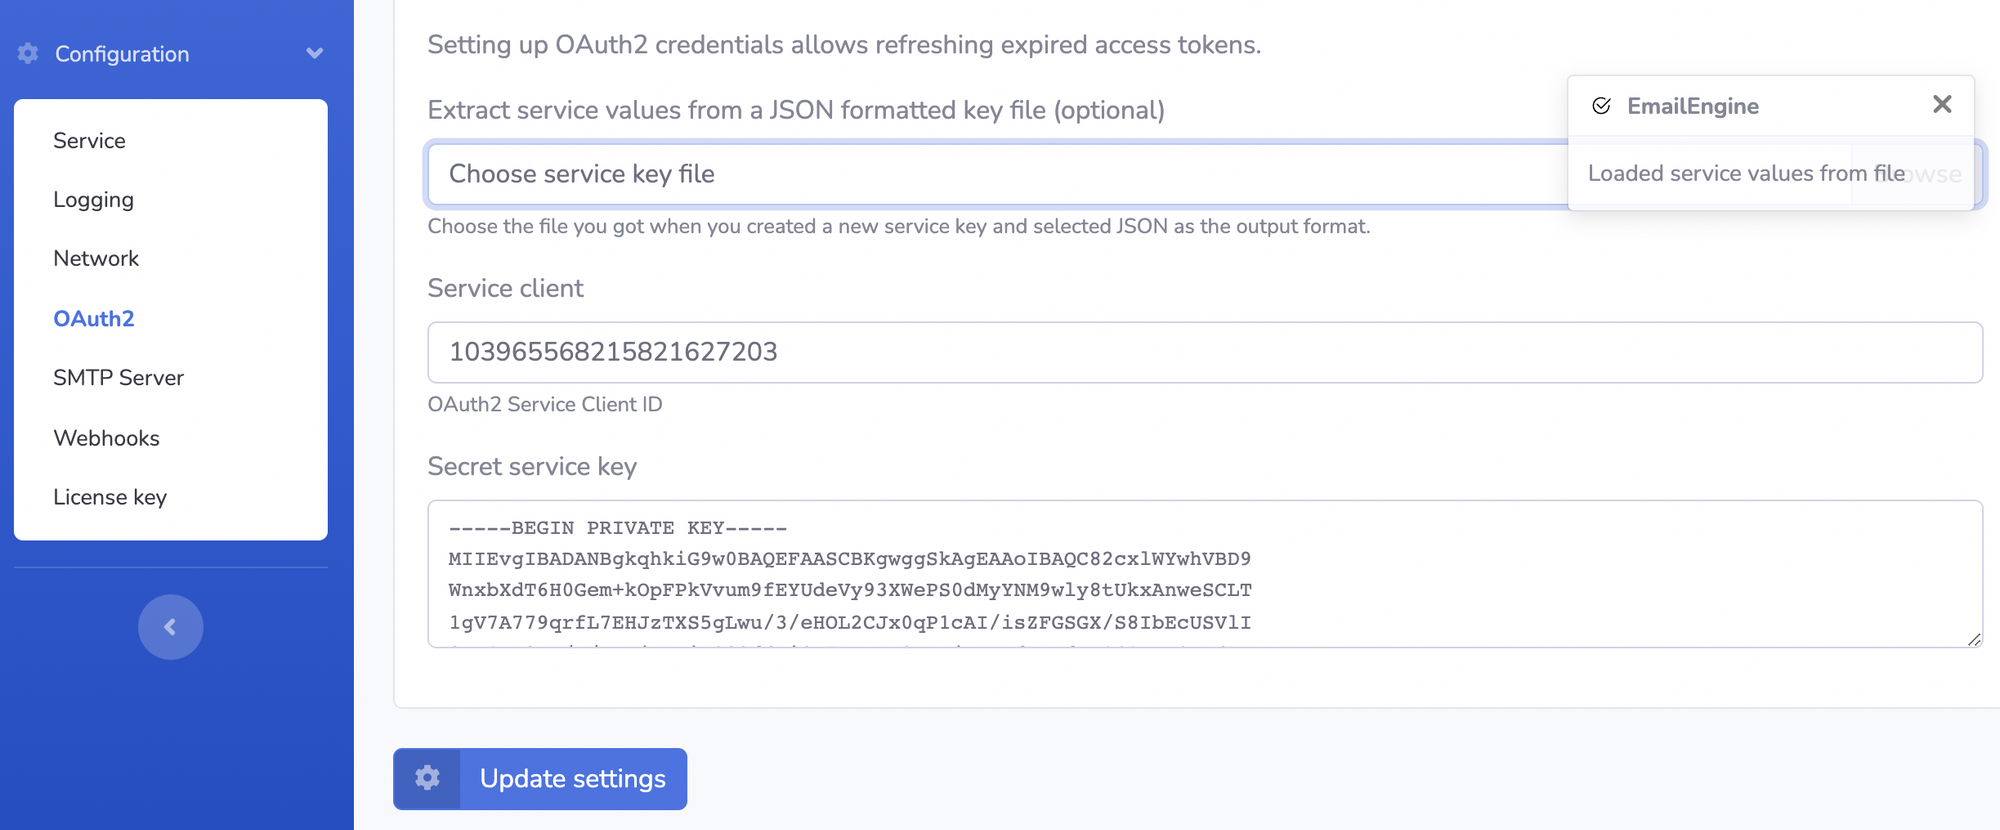
Save the changes, and we are done!
Just for reference, the key file looks like the following and the values we are interested in are client_id that maps to the "Service client" field and private_key that maps to the "Secret service key" field.
{
  "type": "service_account",
  "project_id": "service-test-338412",
  "private_key_id": "83fd56801b0e46d21ad88300b73d3727e6d46961",
  "private_key": "-----BEGIN PRIVATE KEY-----\nMIIEvQIBADANBgkqhkiG9w...\n",
  "client_email": "[email protected]",
  "client_id": "103965568215821627203",
  "auth_uri": "https://accounts.google.com/o/oauth2/auth",
  "token_uri": "https://oauth2.googleapis.com/token",
  "auth_provider_x509_cert_url": "https://www.googleapis.com/oauth2/v1/certs",
  "client_x509_cert_url": "https://www.googleapis.com/robot/.../x509/emaile..."
}
Note that the private key field is encoded so you can't just copy and paste it. Instead, use the file selection feature to let EmailEngine extract relevant values out of this file.
Step 8. Register an email account
Now that EmailEngine is configured to support service accounts, we can add an email account using the API. Note that we do not provide any kind of authentication options. This is because email accounts added using the service accounts do not need it.
curl -XPOST "http://127.0.0.1:3000/v1/account" \
  -H "Authorization: Bearer ef3fdcbf9c9ca2432...." \
  -H "Content-type: application/json" \
  -d '{
    "account": "service",
    "name": "Andris Reinman",
    "email": "[email protected]",
    "oauth2": {
      "provider": "gmailService",
      "auth": {
        "user": "[email protected]"
      }
    }
  }'
No passwords, no tokens, no nothing. We could replace [email protected] with any other @kreata.ee email account and it would still work.
If everything worked as expected, you should see that account in the accounts list.
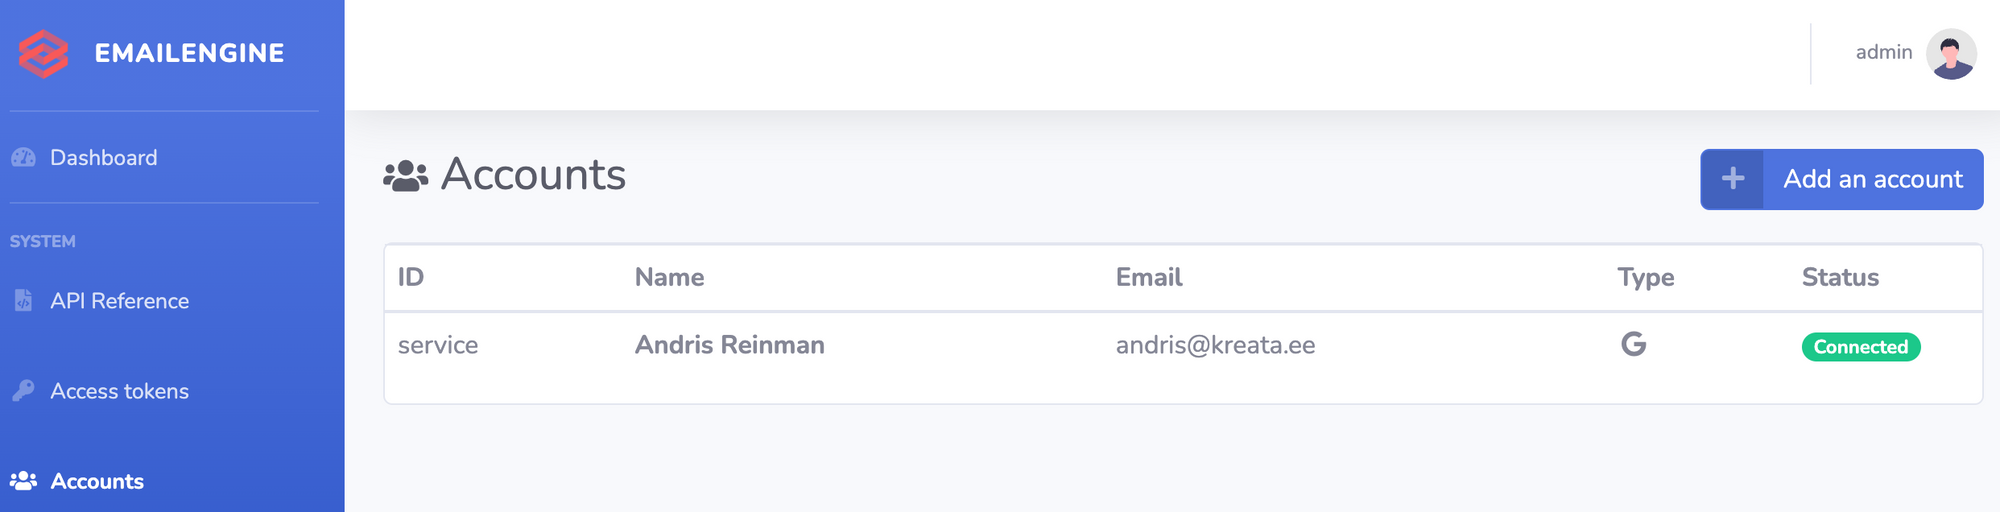
Great success!